Travel Camera Packing List 2026: Gear for Every Trip
Most missed travel photos are not lost because the light failed or the weather turned. They are lost because the wrong bag stayed zipped, the heavy lens stayed in the hotel, or the spare battery was buried under clothes. A smart travel camera packing list is not about owning more equipment. It is about building a kit you will actually carry from dawn ferries to dusty roads to neon streets after dinner. In 2026, the best travel photographers still win with the same old discipline: less guesswork, less dead weight, more readiness.
The truth is simple and a little painful. Many travelers pack for fantasy, not for the trip they have booked. They imagine cinematic wildlife scenes on a weekend city break, or they haul a full-frame body with three lenses up a trail where a compact setup would have delivered better photos because it would have stayed on the shoulder all day. A great travel camera packing list starts with the rhythm of a trip: how far you walk, how often you move hotels, how much weather you face, and how quickly you need to shoot.
That is why this guide is built around trip types rather than brand worship. Whether you are flying to Lisbon for a long weekend, boarding a ferry in Greece, driving desert highways in the American Southwest, or heading out on a safari track that turns your backpack red with dust, the goal is the same: bring the right tools, protect them well, and leave enough room for the journey to feel light.
If you map your route and your heavy shooting days in TravelDeck, it becomes much easier to trim your travel camera packing list down to what really earns its place.
Why a modular travel camera packing list beats a bigger bag

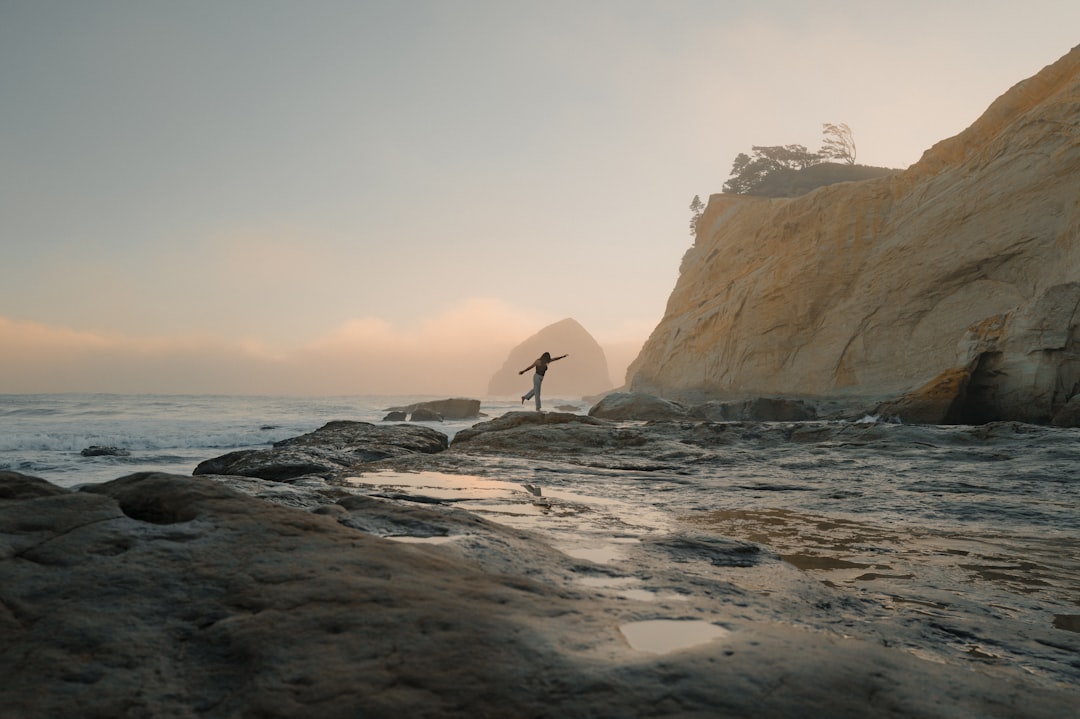
Photo by Dane Deaner on Unsplash
A good travel day rarely looks like a studio day. You are crossing train platforms with one eye on the departure board, ducking under awnings in sudden rain, climbing church towers, squeezing into tuk-tuks, and balancing coffee, passport, and camera at once. Travel punishes clutter. That is why the strongest travel camera packing list is modular: one core kit for every trip, then one small add-on pouch depending on whether the trip is urban, coastal, wild, or road-based.
Think of your bag in layers. Layer one is the gear that comes everywhere: camera body, daily lens, batteries, cards, charger, cleaning cloth, backup method. Layer two is the trip-specific layer: tripod, telephoto, drone, filters, dry bag, action camera, bean bag, or mic. Layer three is the support layer: rain cover, power bank, universal adapter, cable organizer, silica gel, and insurance documents. When travelers skip this logic, they end up repacking every night or carrying equipment they never touch.
A modular system also helps you pack more safely. Lithium batteries, memory cards, chargers, and backup drives do not belong in random jacket pockets. They need assigned homes. When the train is arriving, the ferry is rocking, or the guide is calling for departure, you should be able to reach the right item by instinct, not by excavation.
Here is the simplest way to think about it:
- Core kit: camera body, one main lens, 2 to 4 batteries, charger, 2 to 4 memory cards, card case, cleaning cloth, strap, compact bag or insert
- City add-on: small tripod or clamp, fast prime, spare power bank, discreet wrist strap
- Hiking add-on: rain cover, dry sacks, extra battery warmth pouch, lightweight tripod, water-resistant shell
- Beach add-on: sealed pouches, blower, microfiber cloths, silica gel, salt-safe dry bag
- Safari add-on: telephoto lens, bean bag, dust protection, dual-card workflow, extra storage
- Road trip add-on: car charger, SSD, suction mount or clamp, multi-port USB charger, sun protection for gear
The best part of this approach is psychological. You stop asking, what if I need this lens? and start asking, what shots define this trip? That question makes every travel camera packing list sharper.
The core gear every travel camera packing list should include
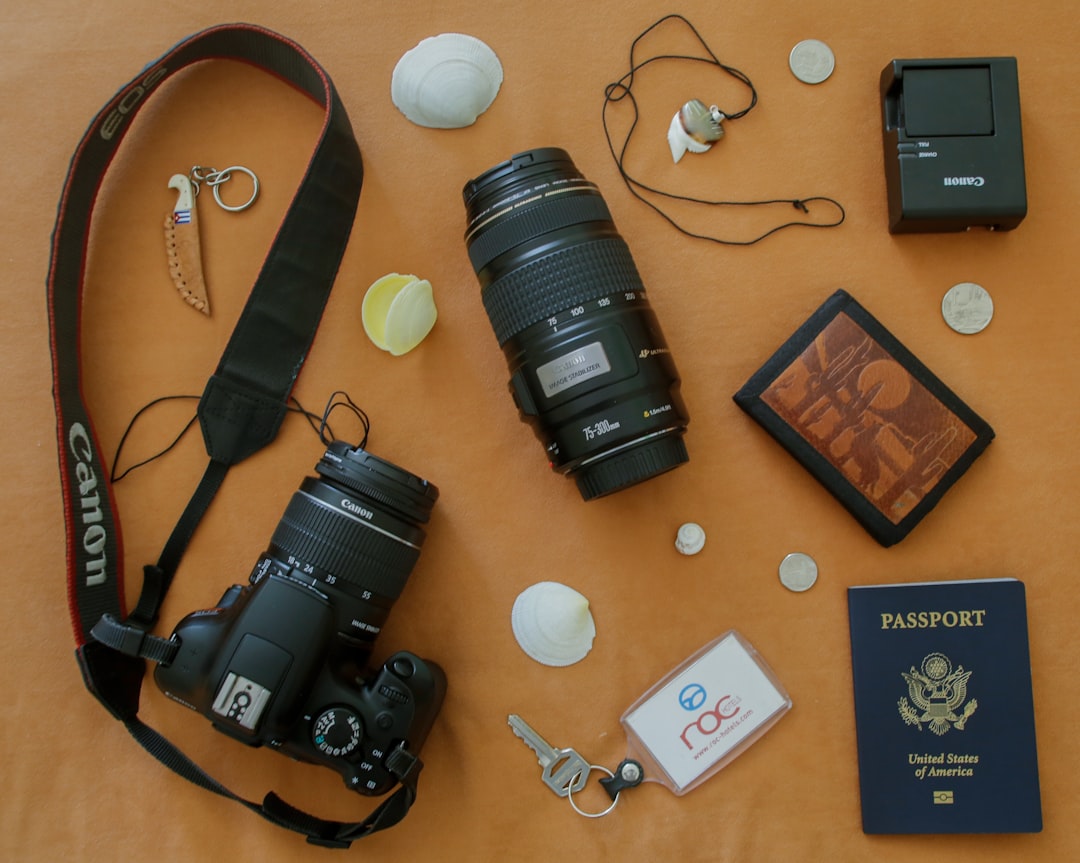
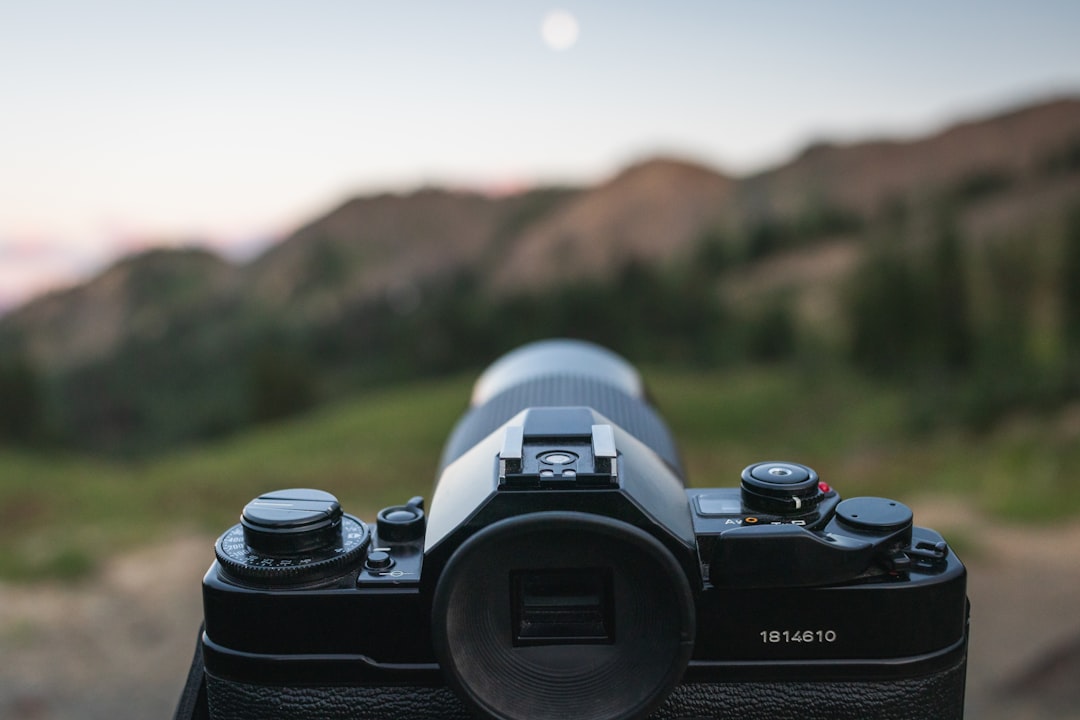
Photo by Chandler Cruttenden on Unsplash
No matter where you go, there is a basic set of equipment that solves most travel photography problems. The shape of that kit changes by budget and skill level, but the logic does not. You need a camera you enjoy carrying, a lens you can trust in changing light, power you can rely on, and a system that protects your images before something gets lost, stolen, soaked, or dropped.
The best camera for travel is not automatically the most expensive body on the shelf. It is the one you will bring to breakfast, to the viewpoint, to the late-night walk after the rain. For most travelers in 2026, that means a mirrorless camera for travel or a high-end compact. Mirrorless systems strike the cleanest balance between image quality, autofocus, low-light performance, and manageable size. Phones remain excellent in good light and unbeatable for convenience, but if photography is a major reason for the trip, a dedicated camera still gives you more control, better files, stronger lens options, and more flexibility in difficult light.
A smart travel camera packing list also accounts for fatigue. A heavy camera that feels glorious on day one can become dead weight on day four. A lighter setup often produces more photographs simply because it stays accessible. That is why lightweight camera gear often beats technically superior gear on the road.
Here is the core kit that suits most travelers:
- Camera body: compact mirrorless or premium compact with strong autofocus and solid battery life
- Main lens: versatile zoom, usually equivalent to 24-70mm or 24-105mm for full frame, or 16-55mm for APS-C
- Optional fast lens: 35mm or 50mm equivalent prime for evenings, food, portraits, and low-light streets
- Batteries: at least 2 spares for day trips, more if you shoot video or cold-weather scenes
- Charging setup: USB-C charging if your system supports it, plus a compact wall charger and one reliable cable
- Memory cards: multiple smaller cards instead of one giant card, stored in a weather-resistant case
- Backup: rugged SSD, tablet, laptop, or cloud upload routine when the connection is good
- Cleaning kit: blower, microfiber cloth, pre-moistened lens wipes, soft brush
- Carry system: a comfortable strap and a camera bag for travel that does not scream expensive gear
- Protection: rain sleeve or bag cover, silica gel packs, lens caps you actually keep attached
A quick comparison of travel camera setups
| Traveler type | Best camera for travel | Main lens | Ideal use | Approx carry weight |
|---|---|---|---|---|
| Minimalist | Premium smartphone or compact camera | Built-in lens | Weekend cities, food, casual travel | 300g to 700g |
| Enthusiast | APS-C mirrorless camera for travel | 16-55mm equivalent or 18-135mm | General travel, hiking, mixed scenes | 900g to 1.6kg |
| Hybrid creator | Compact full-frame mirrorless | 24-70mm plus compact prime | Stills, video, low light, content creation | 1.4kg to 2.2kg |
| Specialist | Full-frame body plus 2 lenses | 24-70mm and telephoto | Safari, landscapes, assignments | 2.2kg to 4kg |
When building your travel camera packing list, start with the smallest setup that can confidently capture your main purpose. Then add one specialized tool only if it clearly expands what you can shoot.
Best camera for travel: choose the right base kit
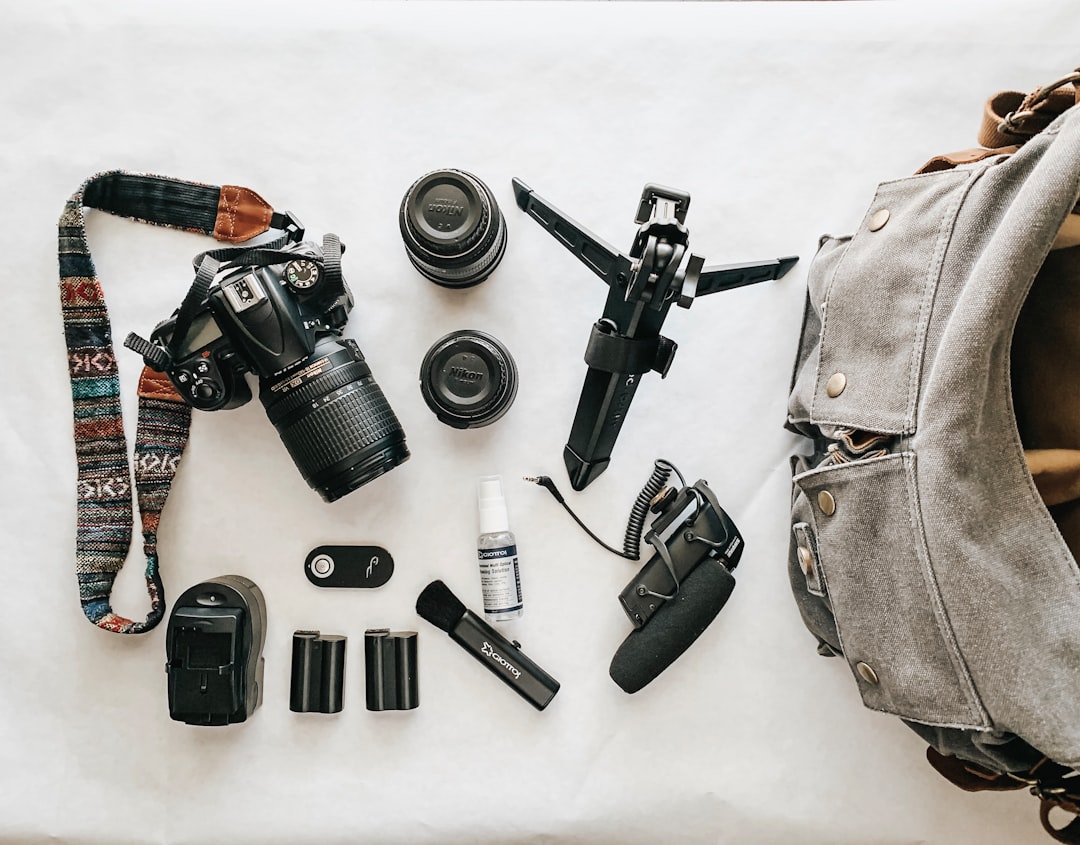
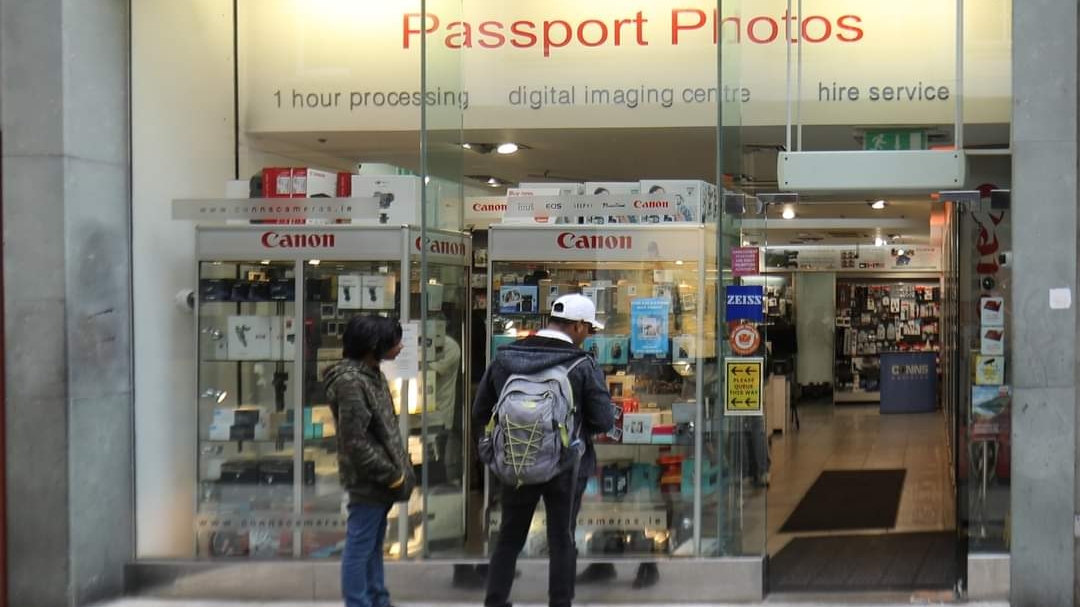
Photo by Derick McKinney on Unsplash
There is a romance around camera gear that airports quietly destroy. The polished metal body, the bright red lens badge, the dream of carrying a complete system through the world like a magazine assignment photographer. Then comes a three-hour layover, a cobbled street at noon, a tiny hotel elevator, or a 5 am departure in the rain. Suddenly comfort becomes creative freedom.
So what is the best camera for travel? For most people, it falls into one of three groups. A modern smartphone is enough if photography is casual and sharing speed matters most. A premium compact is ideal if you care about image quality but refuse bulk. A mirrorless camera for travel is the sweet spot for travelers who want interchangeable lenses, cleaner low-light files, and room to grow.
Sensor size matters, but not as much as habit. If you dislike carrying your setup, the bigger sensor loses in practice. Autofocus, battery efficiency, ergonomics, and lens ecosystem often matter more to a real-world travel camera packing list than a marginal improvement in dynamic range.
Choose your base kit by travel style
- Weekend city breaks: compact mirrorless or premium compact, one zoom, one spare battery
- Backpacking and rail travel: APS-C mirrorless with one versatile zoom and USB-C charging
- Road trips and mixed media travel: compact full-frame with 24-70mm and a small tripod
- Wildlife and safari: mirrorless body with strong autofocus, telephoto reach, dual card slots if possible
- Water and action trips: action camera plus compact mirrorless or just a phone with waterproof housing
What matters most in a travel body
- Fast and reliable autofocus
- Comfortable grip for long days
- USB-C or easy charging options
- Good battery performance
- Weather resistance if you shoot outdoors often
- Easy file transfer only if you will truly use it
- A lens lineup that keeps your travel camera packing list lean
If you are still uncertain, default to versatility. A dependable body with a standard zoom solves more travel situations than a niche setup built for one perfect shot.
Travel camera packing list for city breaks and street-heavy weekends
Cities tempt photographers into overpacking because every corner feels like a genre shift. Morning architecture becomes afternoon market scenes, then café portraits, neon reflections, rooftop skyline, and candlelit dinner details. The rhythm is intoxicating: tram bells, espresso steam, polished church floors, laundry moving above alleys, taxi lights sliding through puddles. A city can make you feel as if you need every focal length. In reality, the best city travel camera packing list is usually the lightest.
When you walk twelve to eighteen thousand steps a day, lightweight camera gear becomes a creative advantage. You raise the camera faster, you look less conspicuous, and you are less likely to leave the bag in the hotel before dinner. For European cities especially, where you may climb hills, stairs, and cathedral towers in the same afternoon, simplicity wins.
A city break is also where discretion matters. A giant telephoto or a bulky backpack can make you look like you are on assignment, which changes how people respond. A compact camera bag for travel, a cross-body strap, and one small body often produce more natural photographs.
What to pack for an urban photography trip
- Compact mirrorless or premium compact camera
- Standard zoom or 35mm equivalent prime
- One spare battery for every half day of heavy shooting
- Small power bank if you use your phone for maps and backups
- Wrist strap or slim cross-body strap
- Mini tripod or table tripod for blue hour and self-portraits
- Polarizing filter only if you love reflections and architecture glass control
- Compact rain sleeve for sudden showers
- Neutral clothing and a non-branded bag
City mistakes to avoid
- Packing a full-size tripod you will resent by lunch
- Bringing three lenses when one zoom and one prime would do
- Forgetting a cloth for greasy lens smudges from cafés and transit
- Relying on one battery during cold or long winter evenings
- Using a bright camera bag that marks you as a target
If you love walking cities alone, pair your setup with habits from Solo Travel Safety Tips 2026: Confident & Secure Alone. A smaller travel camera packing list is not just lighter; it is usually safer.
Lightweight camera gear for hiking, mountains, and adventure travel
Mountain light feels different from city light. It is cleaner, harder, thinner, often colder than expected, and it changes mood in minutes. A trail can begin under pine shadow, open into a sweep of silver rock, then vanish into cloud. Every gram is noticed here. On a long ascent, the wrong lens feels heavier with every switchback.
That is why hiking demands ruthless editing. If your trip includes serious walking, your travel camera packing list must serve movement first. A standard zoom often covers the majority of landscape situations. A wide-angle lens is worth the weight only if sweeping scenes, interiors, or night sky work are central to the trip. A telephoto can be glorious for compression and distant peaks, but it should travel only if you know you will use it often enough to justify the burden.
Adventure travelers often fall into the myth that remote equals professional-grade full rig. The opposite is often true. Lightweight camera gear increases endurance, keeps your camera accessible, and reduces the temptation to stop shooting when the trail gets steep. For travelers planning active itineraries, especially those inspired by Adventure Trips for Thrill Seekers in 2026, Matched by Style, a disciplined travel camera packing list is the difference between carrying gear and making pictures.
What to pack for hikes and active trips
- Mirrorless camera for travel with strong stabilization if possible
- One versatile zoom such as 24-70mm equivalent or 24-105mm equivalent
- Optional ultrawide only if landscapes are the trip priority
- 2 to 4 spare batteries kept warm in cold weather
- Lightweight carbon-fiber travel tripod if sunrise, sunset, or astro matters
- Waterproof shell or dry bag for the camera inside your backpack
- Lens cloth, blower, and zip pouches for dust or trail grit
- Clip or chest-access system so the camera stays reachable
- Small headlamp if you shoot dawn, dusk, or stars
- Plenty of water and a cleaning cloth separate from the lens cloth
Hiking packing strategy
- Keep the camera high in the bag or on a chest clip, never buried under layers
- Pack one lens on the body and only one backup lens at most
- Store batteries in a small pouch you can reach without opening the whole bag
- Use the tripod on the outside only if it stays secure and balanced
- Protect the camera before storms, not after the first drop hits
A hiking travel camera packing list should feel a little austere. That is a compliment. The trail always tells the truth about what was necessary.
Beach, islands, and humid climates: the travel camera packing list most people underestimate
Coastal travel looks forgiving in photographs. White walls, blue boats, bright plates of grilled fish, salt on skin, sun on water. But beaches and humid islands are brutal on gear. Fine sand gets into lens mounts, salt spray dries into crystal streaks, sunscreen smears everything, and humidity fogs glass when you step from an air-conditioned room into heavy tropical air.
This is where a smart travel camera packing list becomes more about protection than expansion. You do not need a dozen accessories. You need the right ones: sealed pouches, absorbent cloths, silica gel, and a realistic understanding that lens changes on a windy beach are often a bad idea. Simpler setups survive better.
For island travel, I usually recommend a weather-resistant body if you own one, but more importantly, a sealed workflow. Use one all-purpose lens most of the time. Change lenses indoors, away from wind. Wipe salt before it dries. Never throw wet gear into a closed bag and forget it until morning.
What to pack for beaches, ferries, and humid destinations
- Camera body with one versatile zoom mounted most of the day
- Waterproof pouch or roll-top dry bag for boat rides and sudden spray
- Multiple microfiber cloths because one will quickly become uselessly salty
- Small blower for sand before wiping the lens surface
- Silica gel packs inside the bag
- Action camera or waterproof phone case for swimming and boats
- Polarizing filter for midday glare on water and wet streets
- Compact tripod only if you plan sunset long exposures
- Spare battery and card in sealed mini pouches
Beach and humidity rules that save cameras
- Never change lenses on the sand if you can avoid it
- Let gear acclimatize slowly when moving from cold air conditioning to humid air
- Wipe straps too, not just glass, because salt lives everywhere
- Use a cheap plastic bag or rain cover on ferries with spray-heavy seating
- Back up every evening because moisture-related failures rarely announce themselves gently
A coastal travel camera packing list should be humble, sealed, and wipeable. The sea rewards simplicity.
Wildlife, safari, and big-distance landscapes
Wildlife trips create a different kind of gear panic. Travelers who happily pack light for cities suddenly want a telephoto, a backup body, a drone, binoculars, a monopod, and enough storage to document a nature documentary. Some of that instinct is valid. Wildlife often happens far away and fast. But the best safari travel camera packing list is still selective.
Dust, vibration, long drives, and narrow shooting windows shape every decision. On game drives, you may photograph elephants in golden light one minute and distant cats under flat midday haze the next. You need reach, yes, but you also need patience, power, and reliable handling. Giant lens swaps in a moving vehicle are awkward and dusty. Two-body setups help if you already own them and know how to manage them, but many travelers do better with one capable body and one telephoto zoom.
If you are trying to keep costs realistic, remember that the world does not reward expensive overkill. A sharp, stabilized telephoto and disciplined technique can outperform a bloated travel camera packing list. This matters even more if your wildlife trip is part of a longer journey through lower-cost destinations, where you may also appreciate ideas from Cheap Countries to Visit in 2026 for Month-Long Trips when deciding whether to carry premium gear every day.
What to pack for safari and wildlife travel
- Mirrorless camera for travel with fast autofocus and good burst handling
- Telephoto zoom, ideally 70-200mm, 100-400mm, or equivalent range depending on destination
- Optional second body or smaller backup camera only if you know you will use it
- Plenty of batteries because long days and bursts drain them quickly
- Multiple memory cards and a strict rotation system
- Rugged SSD or laptop backup every evening
- Soft dust covers or large zip bags for transit between sightings
- Bean bag for vehicle-window support
- Cleaning blower and brush for fine dust
- Modest secondary lens for wider camp, landscape, or people scenes
Wildlife packing strategy
- Mount your telephoto before the drive begins
- Use a separate pouch for spent batteries so you never mix them up
- Keep cards and backup drives on your person, not loose in the vehicle
- Accept that some scenes will be too far away and enjoy them without forcing bad images
- Do not pack a giant tripod unless the lodge-based part of the trip truly needs it
A wildlife travel camera packing list is less about quantity than readiness. Reach, stability, power, and backups matter more than owning every focal length.
Road trips, creator travel, and the camera bag for travel by car, train, and ferry
Road trips seduce you into packing everything because the trunk seems infinite on departure morning. Then comes the reality: hot car interiors, constant unpacking, lookout stops that last six minutes, motel check-ins after dark, and the awkward dance of moving gear in and out so it does not get stolen. A road-based travel camera packing list has more room than a carry-on setup, but it still benefits from restraint.
The real advantage of road travel is support gear. You can justify a slightly larger tripod, a laptop, an external SSD, a dual charger, and maybe an action camera or small drone if the itinerary suits it. But your daily working kit should still collapse into one accessible bag. If every roadside stop requires ten minutes of sorting cables and lenses, you will miss half your best frames.
Road trips also expose gear to heat. Cameras left in cars bake quickly, batteries degrade faster in extreme temperatures, and adhesives on cheap accessories can fail. Your camera bag for travel should move easily from vehicle to shoulder in one motion.
What to pack for road-based trips
- Main camera body with standard zoom attached
- One specialist lens only: ultrawide, telephoto, or prime depending on route
- Tripod if sunrise, desert night sky, or self-portraits are key goals
- Laptop or tablet plus SSD for regular backups
- Multi-port charger and car charger
- Hard sunglasses case or small shell case for filters and cards
- Window cloth and lens cloth kept separate
- Small towel or blanket for dusty pullouts and kneeling shots
- Shade cloth or bag cover to protect gear during quick stops
Daily road-trip workflow
- Keep one grab bag in the cabin, not all gear in the trunk
- Back up in the evening, not after the whole trip
- Never leave cameras visible in parked cars
- Use the car only as transport, not as permanent storage
- Pack water and snacks near your camera kit so stops become productive instead of chaotic
A road-based travel camera packing list should feel mobile, not sprawling. Wheels do not excuse confusion.
Travel photography accessories that actually earn their weight
Accessories are where otherwise sensible travelers lose discipline. Tiny items seem innocent until they fill a pouch with duplicates, tangled cables, forgotten adapters, and three different ways to mount one camera. The best travel photography accessories are not the cleverest. They are the ones that solve recurring problems on real trips.
A strap can change how often you shoot. A blower can rescue a beach day. A compact charger can save you from hotel outlet roulette. A mini tripod can turn a dim rooftop dinner into a keeper shot. But the tenth cable or second backup of a rarely used tool? That is just clutter masquerading as preparation.
The right travel photography accessories depend on the shape of your trip, but a few repeatedly justify their place. These are the items I see pay for themselves across city breaks, ferries, road trips, and rough-weather days.
The most useful travel photography accessories
- Extra batteries: still the number-one insurance policy in any travel camera packing list
- High-quality memory cards: several medium-capacity cards are safer than one huge card
- Card case: weather-resistant and clearly organized
- Universal travel adapter: ideally with USB-C and enough ports for camera and phone charging
- Power bank: especially important if your camera charges by USB-C
- Cleaning kit: blower, microfiber cloths, lens wipes, small brush
- Rain cover: cheap, light, and invaluable
- Compact tripod or mini tripod: only if your style truly includes low light, self-portraits, timelapse, or long exposures
- Filters: a polarizer is the most useful all-round choice; ND filters are great but more specialized
- SSD or backup drive: essential if the trip matters and files are irreplaceable
Accessories most travelers can skip
- Overly heavy gimbals for trips centered on stills
- Large filter kits if you rarely shoot landscapes or video
- Too many straps and clips solving the same problem
- Bulky laptop when a tablet or phone backup workflow is enough
- Second flash unless portrait work is central to the trip
A cleaner accessories pouch makes every travel camera packing list feel more professional, even if your whole setup is modest.
Camera bag for travel: comfort, security, and invisibility
A bag is not just storage. It changes your posture, your speed, your willingness to bring the camera to dinner, and how visible you appear in crowds. The best camera bag for travel often looks nothing like a traditional camera backpack. It may be a quiet sling, a discreet insert inside a plain daypack, or a weather-resistant shoulder bag with thoughtful dividers and no obvious branding.
Comfort matters because travel days are long. Security matters because transit hubs, tram stops, scenic overlooks, and crowded markets are where attention splits. And invisibility matters because a bag that advertises expensive equipment can make you more cautious than creative.
Choose the bag only after choosing the kit. Too many travelers buy space first and then feel obliged to fill it. A lean travel camera packing list deserves a bag that keeps the load close, protected, and easy to reach.
What to look for in a camera bag for travel
- Enough padding without turning the bag into a hard suitcase
- Weather resistance or space for a rain cover
- Quick access to camera and main lens
- Separate pockets for batteries, cards, passport, and cables
- Lockable or tuck-away zippers if you shoot in crowded cities
- Room for a water bottle if it is your all-day bag
- Structure that still feels good when only half full
- A design that does not scream camera gear
Bag types by trip style
- Sling bag: ideal for city breaks, cafés, and short daily walks
- Insert inside a daypack: great for hiking, mixed sightseeing, and low-profile travel
- Dedicated backpack: best for multi-lens setups, wildlife, or heavy hybrid work
- Dry bag or roll-top insert: useful for islands, boats, and wet climates
Your camera bag for travel should help you move like a traveler, not like a pack mule.
How to get there
Transport shapes your gear choices more than most travelers admit. A flight with an 8kg cabin limit demands a different travel camera packing list than a rail-based city hop or a ferry-heavy island route. The table below uses common photo-friendly routes to show how transport affects what you bring.
Before any trip, check current baggage and battery rules directly with the carrier. For cabin safety guidance on batteries and power banks, see official resources from TSA, the FAA, and IATA.
Sample transport scenarios and what they mean for your kit
| Route and trip type | How to get there | Typical duration | Typical one-way cost | What it means for your travel camera packing list |
|---|---|---|---|---|
| London to Reykjavík for landscapes | Flight from LHR or LGW to KEF | 3h 10m to 3h 25m | £60 to £180 on low-cost dates, £180 to £350 full service | Cabin limits can be strict, so favor one body, one main lens, and a compact tripod |
| New York to Lisbon for a city break | Flight from JFK or EWR to LIS | 6h 40m to 7h 15m | US$280 to US$750 depending on season | A compact city-focused kit makes airport, metro, and cobbled walking much easier |
| Milan to Venice for architecture and street scenes | High-speed train from Milano Centrale to Venezia Santa Lucia | 2h 25m to 2h 45m | €19 to €59 if booked early | Rail travel rewards a smaller shoulder bag and easy access, not a giant roller plus backpack |
| Athens to Naxos for island light | Ferry from Piraeus to Naxos Port | 3h 25m to 5h 30m | €42 to €78 depending on vessel and season | Salt spray and stairs make a dry bag, sealed pouches, and one-lens simplicity valuable |
| Kilimanjaro Airport to Arusha for safari | Flight to JRO, then road transfer to Arusha | 50m to 1h 30m by road after arrival | US$35 to US$80 transfer | Dust begins early, so pack telephoto, blower, covers, and backups in carry-on |
| Las Vegas to Zion or Valley of Fire for road-trip landscapes | Rental car from LAS | 1h to Valley of Fire, about 2h 40m to Zion | US$65 to US$130 per day plus fuel | Road trips allow more support gear, but keep one daily grab bag within reach |
If you are planning trains, ferries, or short regional flights, weigh the bag before departure. Many travelers obsess over lenses and forget that chargers, adapters, and batteries quietly tip the scale.
Things to do
A useful travel camera packing list gets sharper when you know the exact kind of scenes you want. Instead of vague plans to shoot everything, choose a handful of signature moments. That approach keeps your kit honest and your eye more attentive.
Below are real activities and locations that illustrate how different trips call for different gear choices. Think of them as photo missions you can borrow, not a mandatory route.
Photo-rich activities worth packing for
- Shoot sunrise from Miradouro da Senhora do Monte, Lisbon
- Photograph blue hour around Harpa and the old harbor in Reykjavík
- Capture long-exposure water at Skógafoss, Iceland
- Work a market morning at Mercado da Ribeira, Lisbon
- Photograph ferry arrival and alley shadows in Naxos Town
- Do a golden-hour game drive in Tarangire National Park, Tanzania
- Shoot night reflections from Brooklyn Bridge Park, New York City
- Photograph stars and desert textures in Valley of Fire State Park, Nevada
These are the moments that should shape your travel camera packing list. Plan the scenes first, then let the equipment follow.
Where to stay
Photographers often choose hotels by style and forget the practical details that make gear management easier: outlet placement, desk space, secure storage, early breakfast, parking for road trips, laundry after dusty travel, and access to sunrise locations before the city wakes. A good stay should support your shooting rhythm, not interrupt it.
Below are gear-friendly options across different trip types and budget levels. Prices are typical ranges for 2026 and vary by season, room type, and booking lead time.
Budget stays
| Property | Destination | Typical price | Why it works for photographers |
|---|---|---|---|
| Selina Secret Garden | Lisbon | €28 to €85 | Social, central enough for tram and viewpoint access, easy for short city kits |
| KEX Hostel | Reykjavík | €55 to €140 | Useful for road-trippers and budget landscape travelers, good common spaces for planning and backups |
| Outpost Lodge | Arusha | US$35 to US$80 | Practical safari staging base with room to reorganize bags before park departures |
Mid-range stays
| Property | Destination | Typical price | Why it works for photographers |
|---|---|---|---|
| My Story Hotel Figueira | Lisbon | €120 to €220 | Walkable old-town access and easy returns for midday battery swaps |
| Hotel Ódinsvé | Reykjavík | €170 to €300 | Comfortable base for dawn and blue-hour urban shooting |
| Arusha Planet Lodge | Arusha | US$120 to US$220 | Spacious rooms, garden setting, and a calm base before or after long wildlife days |
Luxury stays
| Property | Destination | Typical price | Why it works for photographers |
|---|---|---|---|
| Bairro Alto Hotel | Lisbon | €380 to €700 | Rooftop light, central access, and a city break that suits a minimal travel camera packing list |
| The Reykjavík EDITION | Reykjavík | €420 to €850 | Harbor access, polished interiors, and excellent winter-city convenience |
| Gibb's Farm | Karatu, Tanzania | US$850 to US$1,200 | Ideal for a slower safari rhythm, farm and garden scenes, and serious restorative comfort |
When evaluating a hotel, ask yourself four unglamorous but essential questions: Is there enough secure space to lay out batteries and cards? Can I leave before dawn easily? Will I need to carry heavy gear up multiple flights of stairs? And is the neighborhood comfortable for returning after blue hour with a camera bag?
Where to eat
Travel photography is powered by more than batteries. Long shooting days often collapse because photographers forget to eat, hydrate, or choose practical meal stops between sunrise and sunset. The best food stops are not only delicious; they also fit the rhythm of the day, allow quick resets, and place you close to your next shot.
Below are reliable places in photo-rich destinations where the meal itself can become part of the story. Prices are approximate and seasonal.
Good places to refuel between shoots
- Time Out Market, Lisbon
Expect €10 to €25 per person. Good for fast food-focused shooting and easy variety, from croquettes to seafood rice.
- Cervejaria Ramiro, Lisbon
Expect €30 to €60 per person. Famous for shellfish; low-light food shooters may want a fast prime.
- Brauð & Co, Reykjavík
Expect ISK 900 to 2,500. Quick coffee-and-pastry stop before city walks; cinnamon buns are the star.
- Seabaron, Reykjavík
Expect ISK 2,500 to 5,500. Warm lobster soup after a harbor shoot is almost part of the weather strategy.
- Khan's Barbeque, Arusha
- Fifi's Restaurant, Arusha
- Apostolis, Naxos Town
Look for local dishes that also photograph beautifully without taking forever to arrive: grilled octopus in Greek islands, cinnamon pastries in Icelandic cafés, sardines and bifanas in Lisbon, or smoky nyama choma in East Africa. Good food stops keep your energy steady, and steady energy improves every travel camera packing list because you stop compensating for fatigue with unnecessary gear.
Practical tips
The best gear still fails when the travel habits around it are sloppy. This is where a strong travel camera packing list becomes a travel system: how you charge, where you back up, what you keep in carry-on, and how you adapt the same kit to different seasons.
Weather, customs, currency, and connectivity all affect how efficiently you can shoot. A city break in March, an Iceland ring-road drive in October, and a coastal Mediterranean trip in August may all use the same camera body, but they do not use the same battery plan, cleaning routine, or bag organization.
Best months by trip type
| Trip type | Best months | Typical conditions | Packing note |
|---|---|---|---|
| City breaks in Southern Europe | March to May, September to November | Mild light, walkable temperatures, softer crowds | Ideal for a lean travel camera packing list with one zoom and one prime |
| Iceland landscapes | June to September for access, October to March for dramatic weather and northern lights | Rapid weather changes, wind, rain, cold | Bring weather protection, extra batteries, and a tripod if night shooting matters |
| Greek islands and beach trips | May to early July, September | Warm, bright, breezy, less oppressive than peak August | Dry bag, polarizer, cloths, and simple one-lens setup work best |
| East Africa safari | June to October for dry-season wildlife visibility | Dusty roads, early starts, strong sun | Telephoto, dust control, and disciplined backups are essential |
| Southwest US road trips | March to May, October to November | Strong light, large temperature swings | Heat protection, plenty of water, sunrise and sunset tripod plans |
What to pack beyond the camera gear
- Lightweight rain jacket or shell
- Neutral, non-reflective clothing if you photograph people or wildlife
- Hat and sunscreen for beaches, safaris, and road trips
- Thin gloves for cold dawn shoots
- Refillable water bottle
- Universal adapter and multi-port charger
- Printed insurance details and serial numbers stored separately
Safety, connectivity, and legal checks
- Keep all cameras, batteries, and memory cards in carry-on luggage whenever possible
- Back up to two places if the trip matters: card plus SSD, or card plus cloud, or dual cards plus SSD
- Label batteries and rotate them consistently
- Use eSIM or local data when your workflow relies on navigation, weather, and uploads
- Check drone rules before you pack a drone. Official guidance varies by country; see EASA for Europe and the UK CAA for the UK
- Respect photography restrictions in places of worship, border zones, museums, and some markets
- For social comfort and better portraits, local manners matter as much as focal length; Travel Etiquette Around the World 2026: Invisible Rules is useful background before culturally sensitive trips
Currency and payment notes for gear-heavy travelers
- Carry one backup payment card in a different pocket from your main wallet
- Small cash helps for lockers, tips, rural transfers, and market purchases when you are carrying gear
- Keep receipts for expensive equipment in cloud storage before departure
A practical travel camera packing list is always half logistics. That is not boring. It is what protects the freedom to focus on the light.
FAQ
What is the best camera for travel in 2026?
For most travelers, the best camera for travel is a compact mirrorless system or premium compact that you genuinely enjoy carrying. A mirrorless camera for travel is usually the strongest all-round choice because it balances quality, autofocus, lens flexibility, and manageable size.
How many lenses should a travel camera packing list include?
For most trips, one main lens and one optional specialist lens is enough. A city break often needs only a standard zoom or a 35mm equivalent prime. A safari may justify a telephoto. A hiking trip usually improves when you carry fewer lenses, not more.
Do I need a tripod for travel photography?
Only if your style depends on blue hour, night scenes, self-portraits, long exposures, or astro work. Otherwise, a tripod often becomes the least-used item in a travel camera packing list. A mini tripod or compact carbon-fiber model is often the smarter compromise.
How do I protect camera gear on flights?
Keep camera bodies, lenses, batteries, and memory cards in carry-on. Use padded inserts, cap lenses properly, and separate batteries in approved cases or protected terminals. Always check current airline and national aviation rules before flying.
What is the most important accessory in a travel camera packing list?
Spare batteries are probably first, followed closely by memory cards and a backup routine. Many missed shots happen because power runs out or files live on a single unprotected card.
Final thoughts
A memorable trip rarely rewards the heaviest bag. It rewards the setup that keeps pace with the day: light enough for stairs, tough enough for rain, ready enough for wildlife, discreet enough for markets, simple enough for ferry decks and train platforms. The strongest travel camera packing list is the one that makes you more present, not more burdened.
Pack for the photographs you are truly likely to make. Pack for the weather you are actually walking into. Pack for the version of yourself that will still be carrying that bag after lunch. When you do that, your gear stops feeling like luggage and starts feeling like permission: permission to stay out a little longer, turn one more corner, wait for the cloud to move, and come home with images that feel as alive as the journey itself.