Most disappointing travel images are not lost because the light was wrong. They are lost because the right lens was buried in the wrong pocket, the battery died at blue hour, or the bag was so heavy it never left the hotel. Essential travel photography gear is not about carrying everything you own. It is about building a flexible kit that survives airports, rain, dust, theft risk, and long walking days without making you hate the weight on your shoulders.
The smartest travelers learn this early. A dawn street walk in Kyoto, a windy overlook in Iceland, and a dusty game drive in Kenya do not ask for the same setup. Essential travel photography gear should change with the shape of the trip, the climate, the transport, and the style of images you actually want to make. The photographer who carries one excellent zoom, two batteries, and a dry bag often comes home with stronger work than the one dragging three bodies and six lenses through a station at rush hour.
This guide is built for that reality. It covers the gear that earns its place, the items that usually stay home, and the packing strategies that make travel camera gear feel lighter and safer. Whether you are planning a weekend city break, a long-haul landscape trip, a wildlife adventure, or a hybrid creator itinerary with photo and video, this is the travel photography packing list I would want before leaving home.
Build a travel photography packing list that fits the trip
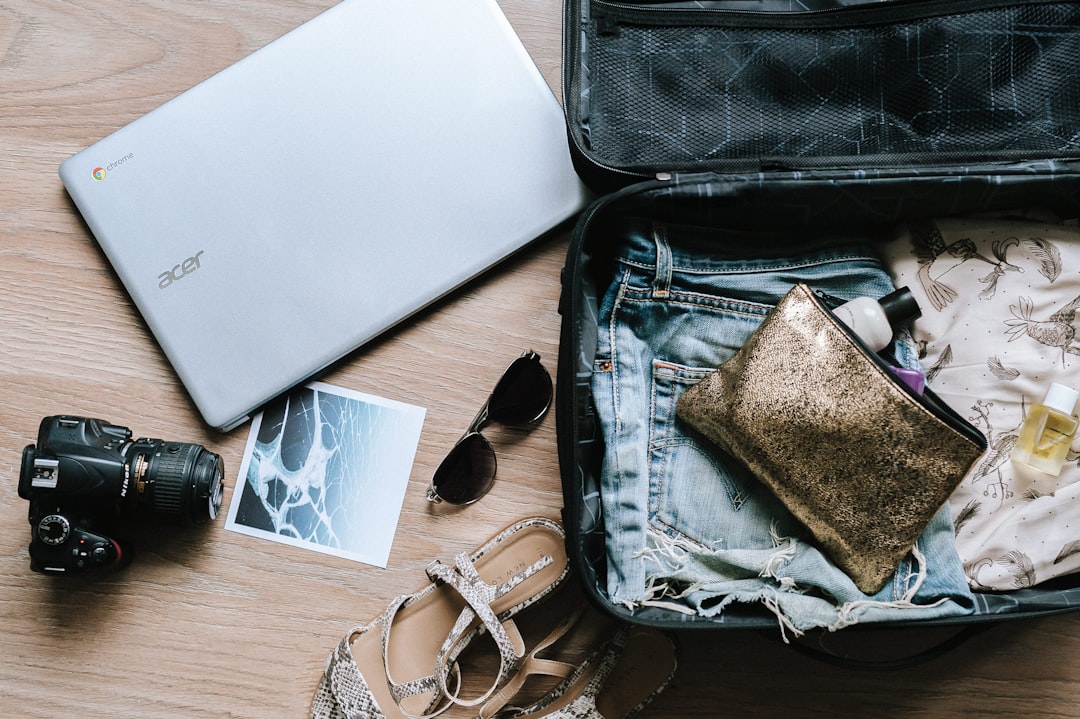
Photo by Anete Lūsiņa on Unsplash
Before you choose a camera body or obsess over focal lengths, start with the trip itself. Think about the sound of rolling suitcase wheels on cobblestones, the squeeze of overhead bins on a budget airline, the salt that rides inland from a beach, the dust that blows into every zipper on a safari track. Camera gear for travel should answer those real conditions, not just look impressive on a desk the night before departure.
The biggest mistake I see is building one permanent kit and forcing every trip to fit it. That is how photographers end up carrying a telephoto through museum-heavy city breaks or packing a tripod for destinations where it will stay in the room. Essential travel photography gear works best when it is modular. You need a core setup, then a few trip-specific add-ons.
A good rule is simple: pack for the images you are 80 percent likely to make, not the 5 percent you might make if everything aligns. That mindset keeps your lightweight photography kit honest and keeps your back happy on day four.
Ask yourself these questions before every trip:
- What will I photograph most: streets, landscapes, wildlife, food, portraits, or video?
- How much walking will I do each day: 5,000 steps or 25,000?
- Will I have a rental car, or will I carry everything on trains, buses, ferries, and stairs?
- Do I need to publish or deliver content on the road?
- How often will I have access to power?
- Am I flying with a strict personal-item airline or a full-service carrier?
- Will I face dust, humidity, rain, cold, or salt spray?
- How comfortable am I with risk if a body or card fails?
The non-negotiable core of essential travel photography gear
Photo by Heather Newsom on Unsplash
Walk into any old city at sunrise and you can feel how little room there is for hesitation. Delivery vans rattle over stone, cafe shutters rise, and the sky changes color by the minute. In those moments, you do not want options that slow you down. You want travel camera gear that is ready before the first shaft of light touches a church tower or market stall.
For most travelers in 2026, the sweet spot is still a compact mirrorless setup. Mirrorless bodies give you strong image quality, excellent autofocus, better video options than many older DSLRs, and a lighter overall system. That does not mean everyone needs full-frame. APS-C remains a superb choice for travelers who care about weight, price, and reach. A smaller sensor paired with a good lens can outperform a heavier system that gets left in the room.
The same principle applies to lenses. An all-purpose zoom solves more problems on the road than a collection of specialists. A 24-70mm or 24-105mm equivalent handles city scenes, portraits, landscapes, food, and detail shots. Add a small prime if you love low light or a wide lens if architecture matters. Everything else should justify its weight.
Here is the core essential travel photography gear I would consider first, with realistic 2026 price bands:
- Camera body: compact mirrorless APS-C or full-frame body, roughly $900 to $3,000 depending on class
- Main lens: 24-70mm, 24-105mm, or 18-55mm equivalent, roughly $300 to $2,400
- Secondary lens: small prime such as 35mm or 50mm, or a wide lens for landscapes, roughly $200 to $1,500
- Spare batteries: at least 2 extras for city trips, 3 to 4 for cold or remote trips, roughly $50 to $90 each for branded batteries
- Charger: USB-C charger if your camera supports it, or a dual-bay charger, roughly $25 to $80
- Memory cards: multiple cards instead of one giant card, usually $20 to $150 each depending on speed and capacity
- Backup storage: 1TB portable SSD, roughly $80 to $160
- Cleaning kit: blower, microfiber cloths, lens wipes, around $15 to $40 total
- Protective carry system: padded insert or travel camera backpack, roughly $60 to $350
- Weather protection: rain cover or dry bag, roughly $15 to $60
Core kit by trip style
| Trip style | Best camera setup | Best lens strategy | Must-pack extras |
|---|---|---|---|
| Weekend city break | APS-C or compact full-frame | One versatile zoom plus tiny prime | 2 spare batteries, 2 cards, small sling |
| Multi-country train trip | Lightweight mirrorless | One all-purpose zoom only | USB-C charging, slim backup SSD |
| Hiking and landscapes | Weather-sealed mirrorless | Wide zoom plus standard zoom | Tripod, rain cover, 3 spare batteries |
| Safari or wildlife | Fast autofocus body | 70-200mm or 100-400mm plus standard zoom | Dust protection, bean bag, extra cards |
| Beach and islands | Compact sealed body if possible | Standard zoom plus optional small prime | Dry bag, silica gel, microfiber cloths |
| Creator hybrid trip | Photo-video mirrorless | Standard zoom plus vlogging lens or prime | Mic, small LED, mini tripod, SSD |
If you want one sentence to guide every purchase, make it this: essential travel photography gear should solve a recurring problem on the road. If an item only solves a fantasy problem, leave it home.
Travel camera gear for city breaks and street photography
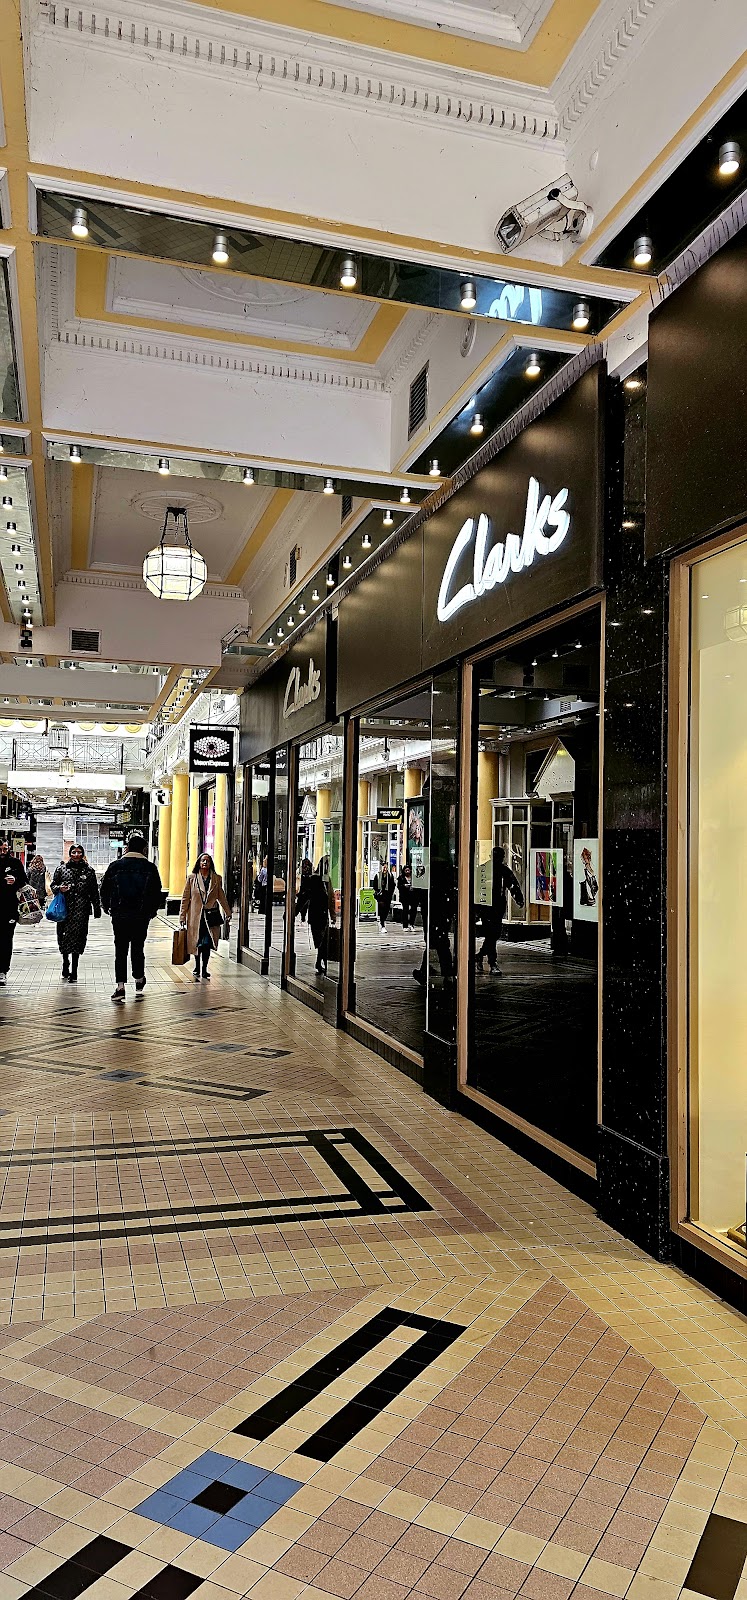
Cities tempt photographers into overpacking because every corner feels like a possibility. Neon reflections in Seoul, tiled facades in Porto, wet tram tracks in Lisbon, steam rising off ramen in Tokyo, brass-lit cocktail bars in Mexico City after dark. You imagine needing ultra-wide for architecture, fast glass for night, a telephoto for rooftop compression, and a tripod for blue hour. Then you remember you are walking all day, stopping for coffee, squeezing through metro gates, and climbing four flights to a guesthouse with no lift.
For city travel, a lightweight photography kit wins almost every time. What matters most is speed, discretion, and comfort. Smaller bodies draw less attention. One good zoom keeps lens changes to a minimum on dusty sidewalks and crowded crossings. A prime earns its place when you love low-light interiors, portraits, or that creamy evening look in narrow lanes. But even then, keep the kit compact enough that you will carry it from breakfast to midnight.
Essential travel photography gear for a city break should feel almost invisible by lunchtime. If your shoulder aches before golden hour, your kit is too big.
A city-focused travel photography packing list looks like this:
- 1 mirrorless body with excellent autofocus
- 1 all-purpose zoom such as 24-70mm or 24-105mm equivalent
- 1 compact prime such as 35mm or 50mm if night scenes matter to you
- 2 to 3 spare batteries
- 2 to 4 memory cards
- Small sling or day bag that fits under a cafe chair
- Microfiber cloth for fingerprints and drizzle
- Power bank if your camera or phone charges via USB-C
- Optional mini tripod only if you know you will shoot night scenes
Leave at home unless the itinerary truly demands it:
- Large tripod for museum-heavy or fast-moving urban trips
- Oversized telephoto for general city wandering
- More than 2 lenses if you are walking all day
- Full laptop if your phone or tablet workflow is enough for a short trip
A lightweight photography kit for hiking, road trips, and landscapes
Landscape travel feels different from city travel the moment the road opens up. You smell pine or wet volcanic soil, hear gravel under boots, and realize that every ounce is going uphill with you. The air can flip from warm sun to cold wind in half an hour. In places like the Dolomites, Iceland, Patagonia, or the American Southwest, your gear is no longer just a creative choice. It is part of your endurance.
Here, essential travel photography gear needs more stability and more weather awareness. A tripod becomes useful rather than aspirational. A wider lens starts to matter because foregrounds, cliffs, lakes, and sky all compete for space in the frame. Battery planning becomes serious in cold weather, where power drains faster than many travelers expect. You may also need gloves, a headlamp, and a backpack that carries water as well as lenses.
This is where a travel camera backpack should earn the word travel. It needs good support, fast side access, weather resistance, and enough room for layers, snacks, and a shell jacket. Beautiful images are hard to make when you are shivering, dehydrated, and digging blindly for a lens cap in sleet.
For landscapes and road trips, pack:
- 1 weather-resistant mirrorless body if possible
- 1 wide-angle lens such as 16-35mm equivalent or wider if architecture and big vistas matter
- 1 standard zoom such as 24-70mm or 24-105mm equivalent
- Travel tripod, ideally carbon fiber if budget allows
- 3 to 4 spare batteries
- Circular polarizer for water, leaves, haze, and glare control
- Small dry bag or rain cover
- Blower and cloths for dust, mist, and spray
- Headlamp for pre-dawn starts and late returns
- Portable SSD for backing up larger RAW sets or video clips
If you are weight-sensitive, simplify even further:
- Choose one standard zoom over multiple primes
- Skip the telephoto unless you already know you use it often
- Pick a lighter tripod or tabletop support for road-based trips
- Use one body instead of carrying a backup unless the assignment is critical
Camera gear for travel on wildlife, safari, and expedition trips
Wildlife travel is the easiest place to convince yourself that bigger is always better. Sometimes it is. A leopard in long grass at dawn, puffins on a windy cliff, elk in morning mist, whales surfacing far beyond the boat line — reach matters. But wildlife trips are also where transport rules, dust, and weight limits get serious very quickly.
On light aircraft to safari camps, baggage limits can be strict, sometimes around 15 kg total in soft bags. On boats, salt and spray challenge every zipper. On overland vehicles, dust can settle into switches and lens mounts before lunch. Essential travel photography gear for these trips should balance reach with realism. A 70-200mm or 100-400mm might be ideal, but only if you can carry, protect, and actually use it comfortably.
Fast autofocus and solid battery life matter more than owning the longest possible lens. So does organization. You do not want to fumble with loose cards while elephants cross the road or while a zodiac bounces in freezing wind.
For wildlife and expedition travel, prioritize:
- 1 main body with strong autofocus and burst shooting
- 1 telephoto suited to your subject, often 70-200mm, 100-400mm, or 200-600mm depending on trip style
- 1 standard zoom for camp, landscapes, people, and environmental scenes
- 4 spare batteries if power is inconsistent
- Many smaller memory cards rather than one huge card
- Dust covers or large zip pouches for transfers
- Soft-sided protective case if weight limits apply
- Lens cloths and blower for dust and spray
- Optional backup body if the trip is expensive and failure is unacceptable
Useful reality checks:
- If you are on your first safari, 200mm to 400mm is often enough for a lot of memorable work
- Very long lenses are harder to handhold in moving vehicles than travelers expect
- Bean bags often work better than tripods on game drives
- If birds are not the main goal, do not build the whole kit around birds
Essential travel photography gear for beaches, islands, and wet climates
Salt is sneaky. Humidity is patient. Sand gets everywhere. Tropical trips may look simple in the packing stage because clothes are light and daylight is abundant, but the environment can punish gear fast. Walk a beach at sunrise in Zanzibar, Maui, or the Greek islands and you feel the moisture on your skin before the sun clears the horizon. That same moisture lands on metal, glass, and rubber seals.
This is where protective habits matter as much as equipment. Essential travel photography gear for coastal and humid destinations should be compact, easy to wipe down, and packed with moisture control in mind. A weather-sealed body helps, but no camera is an invitation to leave gear exposed on a towel while you swim. The smartest travelers bring simple, boring protection: dry bags, resealable pouches, silica gel packets, and extra cloths.
You also want to think about lens changes. Beach wind and sea spray are not friendly places to swap glass. One versatile lens often beats a more ambitious kit.
For beach and island travel, bring:
- 1 compact or weather-resistant body
- 1 versatile zoom that can stay mounted most of the time
- 1 small prime only if you truly love low-light dinners or portraits
- Dry bag or waterproof pouch
- Silica gel packets inside the bag
- Microfiber cloths and sealed wipes
- Lens hood for flare and spray control
- Protective filter if you shoot close to salt spray or blowing sand
- Small towel or wrap to set gear on clean surfaces
Good habits on wet trips:
- Let gear acclimate when moving from air conditioning into humid outdoor air
- Never pack a wet camera straight into an airtight bag for hours
- Wipe down gear every evening
- Keep batteries and cards in internal pouches, not loose beach bags
Travel photography packing list for creators who shoot both photo and video
The modern travel workflow is noisier than it used to be. One hour you are photographing a lantern-lit alley, the next you are recording vertical clips for social, then editing on a train, then backing up in a hotel room with one available outlet. Hybrid travelers need more than classic camera gear for travel. They need power management, fast storage, clean audio, and a bag that does not turn into a tangle of cables.
This is where a lot of travel camera gear lists go wrong. They treat creators like filmmakers on a commercial shoot, which leads to overpacking. Unless you are on assignment with a team, a travel creator kit should still be built around mobility. A small microphone, compact LED, and mini support can add far more practical value than a second heavy lens.
Essential travel photography gear for hybrid shooting is less glamorous than it sounds. Much of it is about friction reduction: one charging standard, one card wallet, one SSD, one pouch for cables, one reliable workflow.
For a photo-video trip, add these to your base kit:
- Compact wireless or on-camera microphone
- Small LED light with USB-C charging
- Mini tripod or grip for stable clips and self-recording
- 1TB or 2TB portable SSD
- High-speed cards sized for your video format
- USB-C hub or reader if your workflow needs it
- Power bank that can top up phone, light, and accessories
- Cable organizer with labeled cords
If you post while traveling, keep the process lean:
- Ingest cards at the same time every evening
- Keep one folder structure across all devices
- Back up before formatting anything
- Batch-charge overnight instead of grazing from random outlets all day
Choosing a travel camera backpack and safer packing strategy
A good bag changes how often you actually shoot. When the bag opens quickly, sits comfortably, and does not scream expensive camera inside, you bring it more places. When it pinches, swings, or forces you to unpack half your wardrobe to reach a battery, the whole system starts to feel like work. That is why a travel camera backpack is not just storage. It is access, comfort, and stealth.
The best shape depends on the trip. For city days, a small sling or discreet day pack often works better than a full camera backpack. For road trips and hiking, a larger backpack with a camera cube gives you room for layers, food, and a tripod. For mixed itineraries, I like a modular setup: camera insert inside a normal-looking travel pack plus a small sling for day use.
Packing strategy matters just as much as the bag itself. Your most valuable items should always ride with you in the cabin. Batteries, cards, bodies, and primary lenses belong in carry-on luggage. Clothing can be replaced more easily than photos. If you need a broader system for your trip overall, How to Pack a Carry-On in 2026 Without Leaving Anything Out pairs surprisingly well with a photography-first packing mindset.
Smart packing rules for travel camera gear:
- Keep the main body with the most-used lens accessible in the top or side opening
- Separate fresh and full memory cards in clearly different cases
- Store spare batteries with terminals protected
- Use padded dividers only where needed; excess padding adds bulk fast
- Put heavy items close to your back for better comfort
- Keep rain cover in the quickest-access pocket
- Carry a plain tote or packable day bag for markets or dinner, so you do not always bring the full kit
- Avoid bags covered in camera-brand logos when theft risk is higher
A travel camera backpack is worth paying for when it gives you three things: real support, weather resistance, and quick access. Fancy materials matter less than those basics.
How to get there with camera gear in 2026
Transport shape should influence your kit before you leave home. The same photographer may travel from New York to Reykjavik for windswept landscapes, from London to Marrakech for architecture and markets, or from Singapore to Bali for surf-and-sunset content. Each route changes baggage rules, comfort needs, and how much weight feels tolerable on arrival.
Flights are usually the most restrictive leg, but trains, buses, ferries, and road transfers can be the most annoying. A rolling bag may glide through Heathrow and become a burden in Venice or on a Sicilian ferry ramp. A giant hard case may look safe, then fail the overhead-bin test on a regional jet. Essential travel photography gear has to arrive intact, but it also has to move smoothly once you land.
If your trip includes long flights, tight connections, or one-bag travel, it is worth reviewing Long Haul Flight Tips for 2026: Stay Comfortable in Economy because fatigue changes what gear you are willing to carry after landing.
Sample transport scenarios and what they mean for your kit
| Route and transport | Typical duration | Typical 2026 cost | Gear priority |
|---|---|---|---|
| New York JFK to Reykjavik KEF | 5 hr 45 min nonstop | $350 to $700 return | Wide zoom, weather cover, gloves, 3 batteries |
| London LHR to Marrakech RAK | 3 hr 40 min nonstop | $90 to $250 return | Standard zoom, dust protection, compact bag |
| Singapore SIN to Denpasar DPS | 2 hr 45 min nonstop | $120 to $300 return | Dry bag, versatile zoom, USB-C charging |
| Tokyo HND to Sapporo CTS | 1 hr 40 min nonstop | $70 to $180 one way | Compact kit, winter battery planning |
| Los Angeles LAX to Jackson Hole JAC | 2 hr 20 min nonstop | $180 to $400 one way | Landscape lens, tripod, layered backpack |
| Nairobi WIL to Maasai Mara by light aircraft | 45 to 60 min | $180 to $320 one way | Soft bag, strict weight discipline, telephoto |
| Milan to Lake Como by train | 40 to 70 min | $6 to $15 | Small sling, light tripod only if needed |
| Athens to Santorini by ferry | 5 to 8 hr | $45 to $90 | Dry protection, compact kit, easy-carry bag |
Transport reminders that save headaches:
- Carry lithium batteries in cabin baggage, not checked bags
- Check airline personal-item and cabin limits before you fly, especially on low-cost carriers
- Use soft bags for bush planes and small regional aircraft
- Keep a printed or offline gear list with serial numbers
- Leave extra room in your bag for snacks, layers, and documents on transit days
Things to do with a smart travel photography packing list
The most useful gear is the gear that directly supports what you plan to shoot. Imagine the itinerary before you zip the bag. Blue hour arrives fast in cities. Wildlife appears and vanishes without warning. Mountain light can turn cinematic and then disappear behind fog in ten minutes. A good travel photography packing list is really a shooting plan in disguise.
I like to think in scenes rather than gear categories. Not lens, but lantern alley at dusk. Not tripod, but long exposure beside a waterfall after rain. Not power bank, but two more hours of map use, editing, and camera charging on a train. When you plan this way, camera gear for travel becomes more precise and much less bloated.
Here are specific travel photography activities and the gear that earns its place:
- Sunrise viewpoint in Lisbon at Miradouro da Senhora do Monte: standard zoom, compact tripod, 2 batteries, microfiber cloth for morning moisture
- Street photography around Shibuya Crossing and Golden Gai in Tokyo: small body, 35mm or 24-70mm equivalent, no tripod, low-profile sling
- Blue-hour architecture around Gion and Yasaka Pagoda in Kyoto: standard zoom, fast prime, mini tripod if legal and practical
- Long exposures at Kirkjufell in Iceland or Lower Yellowstone Falls in Wyoming: sturdy travel tripod, wide lens, rain cover, spare battery
- Wildlife drives in Maasai Mara or Kruger: telephoto, bean bag, dust cloth, many smaller cards
- Food shooting at Maxwell Food Centre in Singapore or Mercado de San Miguel in Madrid: standard zoom, small prime for low light, no oversized bag
- Coastal dawn around Bondi Icebergs in Sydney or Oia paths in Santorini: standard zoom, dry bag, cloths, lens hood, sun protection
- Rooftop skyline sessions in New York from Top of the Rock or in Bangkok from Mahanakhon area: standard zoom, fast lens, stable support only if allowed
The point is not to chase every genre on one trip. It is to let your kit match the scenes most likely to matter.
Where to stay when your gear needs security, space, and charging
Photographers often choose hotels for location and forget workflow. Then they end up editing on the bed beside a single wall outlet, drying a damp rain shell over a chair, and balancing batteries near the kettle. Accommodation choice affects your images more than many travelers realize. If the room is secure, well-lit, and easy to organize, you start earlier, recharge more reliably, and worry less about theft.
For short city trips, I look for central hotels with in-room safes large enough for a camera body, desk space, blackout curtains, and easy airport or train access. For landscape travel, I prioritize parking, self-catering, and enough room to spread out wet gear. For long creator trips, laundry and multiple outlets are almost as useful as a good mattress.
Photographer-friendly places to stay by budget
| Budget tier | Good options | Typical price range | Why it works for photographers |
|---|---|---|---|
| Budget | ibis Styles, Motel One, local guesthouses with private room | $70 to $140 per night | Central locations, simple rooms, decent desks, easier on gear-heavy itineraries |
| Budget | Moxy properties in major cities | $90 to $160 per night | Compact but efficient, social lobby, often near transit |
| Budget | Well-rated apartments on major booking platforms | $80 to $150 per night | More room to organize gear, often laundry and kitchen access |
| Mid-range | citizenM, Hyatt Place, NH Collection | $150 to $260 per night | Reliable outlets, better work surfaces, consistent locations |
| Mid-range | Staybridge Suites or Residence Inn | $170 to $280 per night | Fridge, kitchenette, longer-stay practicality, easier battery management |
| Mid-range | Boutique hotels near old-town cores | $140 to $300 per night | Early access to sunrise streets, less transit with gear |
| Luxury | Four Seasons, Andaz, Rosewood | $450 to $1,200 per night | Excellent service, secure storage help, spacious rooms |
| Luxury | Aman or high-end safari lodges | $900 to $2,500 per night | Strong logistics support, premium guiding, ideal for specialist trips |
| Luxury | Design-forward resorts with private terraces | $500 to $1,500 per night | Better light, space, and calm for sunrise or content-heavy stays |
When comparing stays, look for:
- Elevator access if your kit is heavy
- Strong room security and lock reliability
- Early breakfast or takeaway options for dawn shoots
- Laundry for dusty or wet trips
- Parking or pickup convenience for road-based itineraries
Where to eat without losing your best light or your gear
Travel photography days rarely follow comfortable meal times. You leave before sunrise, forget lunch because the light turns perfect, then realize by 3 pm that you are tired, dehydrated, and making sloppy decisions. Good food strategy is part of good photography strategy. It keeps your energy stable and helps you avoid risky moments like setting expensive gear on the ground while juggling coffee and a pastry.
I prefer places that fit the rhythm of shooting: food markets early in the day, quick local staples between locations, and sit-down dinners after the gear is back in the room. The best meals on photography trips are often the ones that are fast, local, and easy to eat without turning your camera strap into a sauce-covered mess.
Good photographer-friendly food stops around the world include:
- Lisbon: pastel de nata and espresso in Baixa before a tram and miradouro morning
- Tokyo: onigiri from a convenience store for pre-dawn starts, then ramen or yakitori in Shinbashi after dark shooting
- Istanbul: simit and tea around Eminonu before ferry crossings and market walks
- Mexico City: tacos al pastor or tamales near Centro or Coyoacan between street sessions
- Singapore: Maxwell Food Centre for chicken rice, kaya toast breakfasts, and fast hawker meals between shoots
- Marrakech: msemen in the morning, then tanjia or tagine near Jemaa el-Fnaa after sunset photography
- Rome: supplì or pizza al taglio for fast lunches, then a slower trattoria dinner after blue hour along the Tiber
Simple meal rules that protect your gear and your energy:
- Eat something before sunrise shoots, even if it is small
- Carry a water bottle on hot city or safari days
- Choose shoulder-friendly bags so you can sit and eat without dumping gear on the floor
- Back up cards before celebratory dinners when possible
Practical tips for batteries, backups, weather, customs, safety, and connectivity
Travel rewards preparedness more than perfection. I have seen photographers handle storms beautifully and then lose images because a single memory card failed. I have seen travelers protect their camera from rain and then leave a whole bag unattended while buying train tickets. Essential travel photography gear does not end at the hardware. It extends into habits.
Start with batteries. Spare lithium batteries should travel in carry-on luggage, with terminals protected. This is not just common sense; it is part of airline safety rules. Review official guidance before you fly, especially if you are carrying drones, high-capacity power banks, or multiple camera batteries. Good starting points are TSA spare lithium battery guidance, FAA PackSafe, and IATA lithium battery guidance.
Then think about data. The best travel photography packing list always includes redundancy. Multiple cards. A nightly backup. A second copy whenever the work matters. If you are also relying on phones, maps, eSIMs, and editing tools on the road, Best Travel Apps 2026: 17 Essentials for Easier Trips is a useful companion read. When I am mapping shoot times, transfer days, and hotel check-ins for a photo-heavy trip, I often sketch the whole rhythm in TravelDeck so my transport, light windows, and packing choices line up.
Practical rules worth following on every trip:
- Register expensive gear for customs if your country offers a re-entry form, such as the U.S. Certificate of Registration for Personal Effects Taken Abroad
- Check local drone laws before departure; for Europe, start with the EASA drone rules
- Back up every evening before formatting cards
- Do not leave cameras visible in rental cars, even briefly
- Split cards and batteries across pockets or bags when possible
- Bring a cheap rain cover even if the forecast looks clean
- Use silica gel in humid climates and let gear dry before sealing it away
- Keep one written list of serial numbers in cloud storage and offline notes
- Use hotel safes selectively; if a safe is tiny or flimsy, discreet room storage may actually be better
- Carry a plain cloth or scarf to cover gear inside a bag in crowded areas
For weather and season planning, use these general cues:
| Condition | What changes in your kit |
|---|---|
| Winter and alpine cold | Add 1 to 2 extra batteries, gloves, dry storage, lens cloths |
| Tropical humidity | Add silica gel, dry bags, fewer lens changes |
| Desert dust | Add blower, sealed pouches, fewer body-lens swaps |
| Constant rain season | Add rain cover, waterproof outer shell, easy-dry towels |
| Long summer daylight | Add sunglasses, sunscreen, lighter tripod strategy |
FAQ
What is the best camera setup for first-time travel photography?
For most beginners, the best setup is one lightweight mirrorless body and one versatile zoom. That combination covers streets, food, landscapes, and portraits without forcing constant lens changes. Add 2 spare batteries, multiple cards, and a simple travel camera backpack or sling.
Do I really need a tripod for travel photography?
Not always. A tripod is most useful for landscapes, night photography, long exposures, self-portraits, and some video work. For city breaks focused on walking, food, and street scenes, many travelers can skip it. For hiking trips or Iceland-style road trips, it becomes far more valuable.
How many lenses should I bring on a trip?
Most travelers are happiest with 1 to 2 lenses. One all-purpose zoom is enough for many trips. Add a second lens only if you know why you need it, such as a wide-angle for landscapes or a fast prime for low light. More lenses often mean more weight, more indecision, and more missed moments.
How should I carry camera batteries on flights?
Carry spare lithium batteries in your cabin bag with terminals protected. Do not put loose spare batteries in checked baggage. Check your airline rules in addition to airport security guidance, especially if you carry large power banks or drone batteries.
Is a phone enough, or do I need a dedicated camera?
A phone is enough for many travelers, especially on short city breaks or casual trips. A dedicated camera becomes more valuable when you want better low-light performance, longer focal lengths, faster autofocus, RAW workflow, or more control over video and weather-heavy shooting.
What is the most overlooked item in a travel photography packing list?
Usually it is not a lens. It is spare power, backup storage, or a cleaning cloth. A dead battery, full card, fogged lens, or grimy front element will ruin more travel photos than not owning a specialty lens.
Travel changes the way gear feels. The same camera that seems featherlight at home can feel punishing after a missed connection, a wet hike, or a 20,000-step city day. That is why the best essential travel photography gear is rarely the biggest or most expensive setup. It is the kit that you trust, the kit that fits the trip, and the kit you are still happy to carry when the sky finally turns beautiful.
Pack for movement. Pack for weather. Pack for the stories you know you want to tell. If you do that, your bag gets lighter, your decisions get quicker, and your photographs usually get better too.