Best Travel Photography Kit in 2026 for Every Trip Style
A great travel photo rarely happens because you packed more. It happens because you packed better. The best travel photography kit is not the heaviest bag in the airport security line or the flashiest setup on a viewpoint at sunrise. It is the kit that matches the trip in front of you: a humid island hop, a cold northern road trip, a fast city weekend, or a dusty safari track.
That is the mistake most travelers make with camera gear. They pack for fantasy rather than reality. A three-lens setup sounds thrilling at home, then feels absurd on the fourth staircase in Naples, the sixth hour in a Tokyo station, or the first sandy gust on a Cycladic ferry. I usually start planning the best travel photography kit by looking at transit days, hotel storage, walking distance, and weather, often sketching the whole flow in TravelDeck before I decide which lens earns a place in the bag.
This guide is built for real movement. You will find trip-specific gear strategies, a practical photography packing list, sample transport plans, places that suit photo-first travelers, and the small decisions that keep your camera ready when the light finally turns gold. If you want a sharper, lighter, calmer way to travel with a camera in 2026, start here.
Why most travelers overpack camera gear for travel
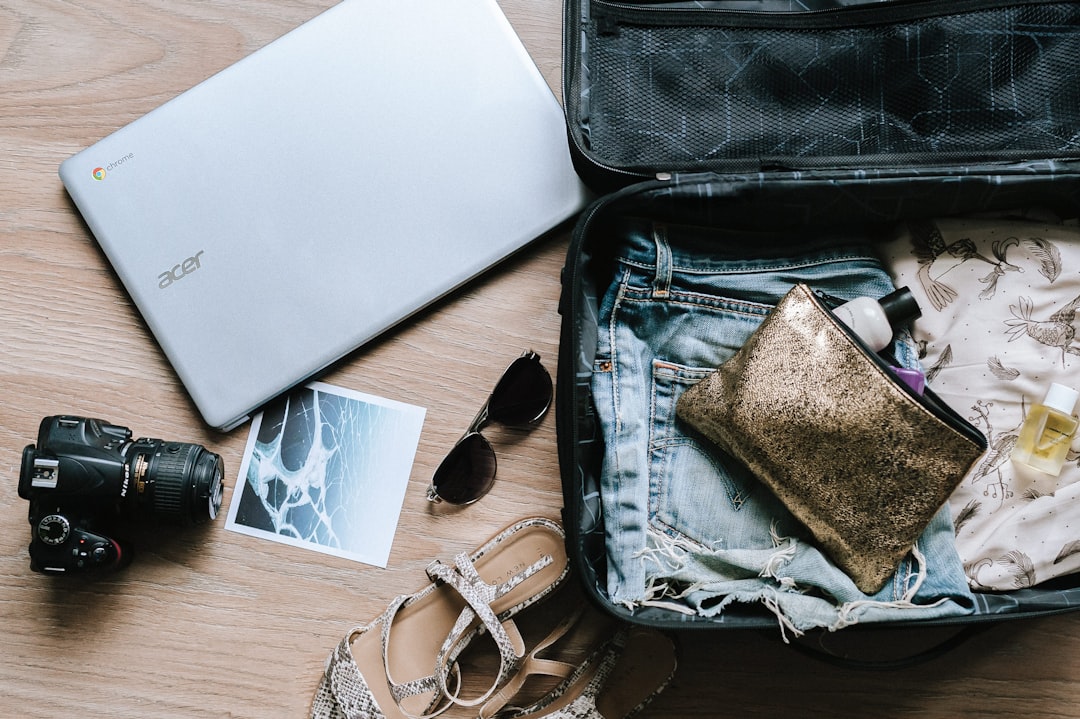
Photo by Anete Lūsiņa on Unsplash
The emotional pull of photography is strong. You imagine glacier lagoons glowing blue, market stalls under warm bulbs, mountain ridges turning pink at dawn, and you want to be ready for all of it. The problem is that every piece of equipment makes a promise. A telephoto promises wildlife. A prime promises dreamy night portraits. A drone promises scale. A tripod promises silky water. Soon your camera gear for travel becomes a bag of possible futures rather than a kit designed for the trip you actually booked.
In practice, travel photography is usually a game of access, stamina, and repetition. You carry the same gear through airports, over cobblestones, up hostel stairs, into taxis, onto ferries, and across hotel lobbies. You take the same camera out dozens of times a day. The right setup should feel almost invisible until the moment it matters. That is why the best travel photography kit starts with restraint.
Before you pack, answer four questions:
- How many hours a day will you carry your gear?
- Will you shoot mostly wide scenes, people, wildlife, or video?
- How often can you recharge batteries and back up files?
- What is the single shot type that matters most on this trip?
Use that last answer as your filter. If you are going to Iceland for waterfalls and black-sand beaches, your priorities are weather resistance, stability, and wide-to-standard focal lengths. If you are heading to Marrakech or Mexico City, speed, discretion, and one compact body matter more than an elaborate rig. If you are going to Tanzania for wildlife, reach and fast autofocus suddenly become non-negotiable.
| Trip style | Main visual goal | Smartest body choice | Lens strategy | Nice-to-have | Leave at home |
|---|---|---|---|---|---|
| City break | Streets, architecture, food, night scenes | Compact body or mirrorless camera for travel | 24-70mm equivalent or 35mm prime | Mini tripod | Big telephoto |
| Hiking trip | Landscapes, trails, weather, sunrise | Weather-sealed compact or APS-C mirrorless | Wide zoom plus one small prime | Filter kit | Heavy flash |
| Beach or island | Sun, water, boats, portraits | Sealed body, phone, or action cam | Standard zoom and CPL filter | Dry bag | Lens collection |
| Safari | Wildlife at distance | Fast AF mirrorless or DSLR | 100-400mm or 70-300mm plus short zoom | Bean bag | Ultra-wide specialty lenses |
| Winter trip | Snow, low light, interiors | Good battery management and strong IBIS | 24-105mm equivalent plus fast prime | Spare batteries | Unsealed accessories |
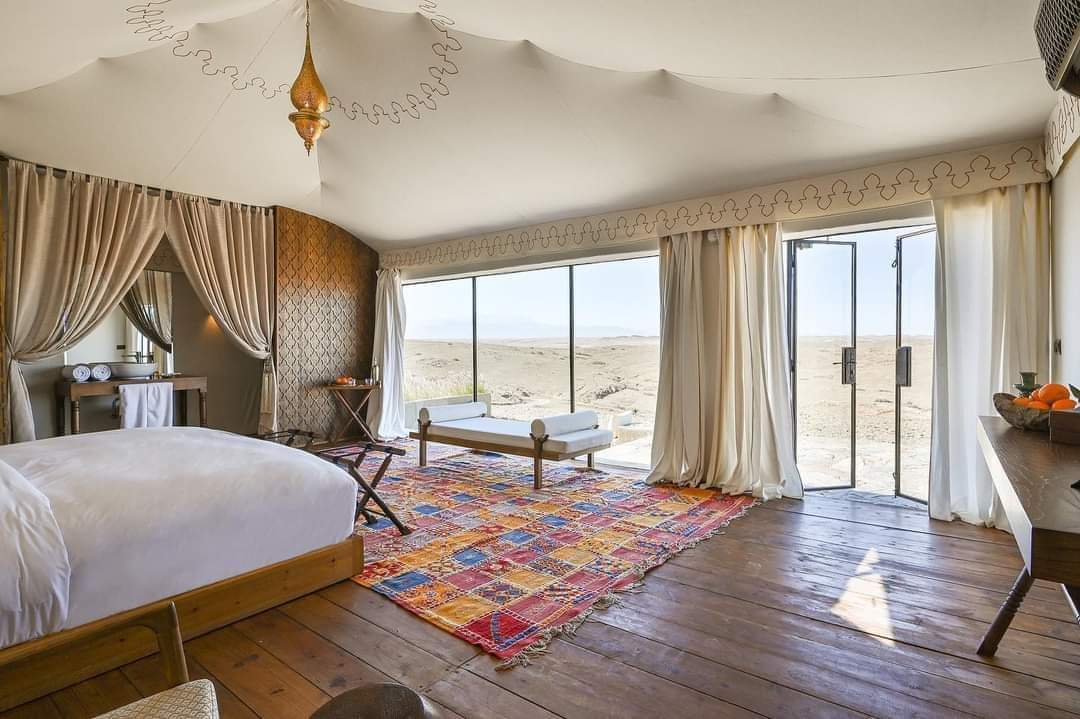
The core setup: what belongs in every photography packing list

Brendan Coleman Photography
Every destination feels different, but the skeleton of a good travel kit barely changes. A camera body, one or two well-chosen lenses, power, storage, protection, and a system for carrying it all. The trick is that each item needs to do more than one job. Your camera should be good enough in low light and light enough to bring everywhere. Your bag should protect gear without screaming expensive camera inside. Your storage should be fast, reliable, and simple enough to use when you are tired at midnight in a hotel room.
This is where a lightweight camera kit wins. It gives you permission to keep moving. When you stop worrying about whether you brought enough equipment, you start noticing the scene itself: a tram window reflecting evening sun, salt blown across a harbor wall, incense smoke in temple light, the texture of wet pavement after a storm. Good gear supports that attention; it should never replace it.
For most travelers in 2026, this is the smartest baseline for the best travel photography kit:
- One main body, ideally a mirrorless camera for travel with reliable autofocus, USB-C charging, and strong battery life
- One all-purpose lens, usually a 24-70mm or 24-105mm equivalent
- One specialist lens only if the trip demands it, such as a fast 35mm prime, an ultra-wide, or a telephoto
- Smartphone with strong computational photography as backup camera, note-taker, map, and quick editor
- Two to four batteries, depending on cold weather, video use, and charging access
- Multiple memory cards instead of one huge card, so one card failure does not ruin the trip
- Small SSD for nightly backup
- Lens cloth, blower, and a few sensor-safe cleaning wipes
- Compact tripod or tabletop support if you expect sunrise, night scenes, or self-portraits
- Weather cover or dry bag if you will face rain, surf, snow, or dust
If you are deciding between camera types, start with reality rather than aspiration. A smartphone is enough for casual travelers, fast-moving families, and social-first creators who value instant edits. A compact premium camera works well for travelers who want better optics without changing lenses. A mirrorless camera for travel is still the sweet spot for most enthusiasts because it balances quality, weight, autofocus, and lens choice. DSLR bodies remain useful for wildlife and long battery life, but for most modern trips they are bulkier than they need to be.
The same restraint applies to lenses. Most people do best with one of these setups:
- One-lens setup: 24-70mm equivalent for general travel
- Two-lens setup: 24-70mm equivalent plus 35mm or 50mm prime
- Adventure setup: wide zoom plus standard zoom
- Wildlife setup: telephoto zoom plus short standard zoom
If you want a simple rule, let the lens count follow the transport count. The more planes, trains, buses, ferries, and hotel changes your itinerary includes, the fewer lenses you should bring.
Best travel photography kit for city breaks
Photo by jing chen on Unsplash
Cities reward speed. Light bounces off glass, then disappears behind buildings. A violinist appears in a metro tunnel, a waiter lifts a tray into perfect backlight, a tram door opens and closes in six seconds. On a city trip, the best travel photography kit is the one you can reach with one hand while crossing a square or climbing a bell tower. Weight is not just a comfort issue here; it changes what you notice.
Urban travel also puts you in dense, human environments. Big rigs attract attention in museums, cafés, markets, and residential streets. In places where discretion matters, a smaller camera keeps the mood softer. It also helps you follow the social cues in destinations where photographing people requires more tact, something worth remembering alongside Unspoken Travel Rules Abroad in 2026: Be a Better Guest.
For a city break, think slim, quiet, and flexible. Your lightweight camera kit should handle architecture at noon, food at lunch, portraits at golden hour, and night streets after dinner.
Recommended city-break setup:
- Body: compact full-frame or APS-C mirrorless camera for travel
- Main lens: 24-70mm equivalent or 16-55mm on APS-C
- Optional second lens: 35mm f/1.8 or 50mm f/1.8 for night scenes and portraits
- Accessories: wrist strap, one spare battery, 2 to 3 memory cards, mini tripod, compact power bank
- Bag: a discreet travel camera bag or insert inside a regular daypack
What works especially well in cities:
- Cross-body carry for quick access in busy neighborhoods
- Silent shutter where allowed
- One-lens walking days to reduce decision fatigue
- USB-C charging in cafés, trains, and airport lounges
- A polarizer only if you plan to shoot lots of glass, water, or rooftop scenes
What to avoid:
- Carrying every lens all day just because the hotel is far away
- Huge backpacks in crowded transit systems
- Frequent lens changes in dusty streets or on windy rooftops
- Letting gear define your route instead of the city itself
The city version of the best travel photography kit is often the smallest one in this article, yet it may produce your most varied work. Streets force you to respond quickly, and compact gear keeps your attention on rhythm, gesture, light, and color rather than logistics.
Best travel photography kit for hiking and adventure trips
Adventure trips introduce a different pressure: endurance. A steep trail makes every extra gram feel personal. You feel it in your hips, shoulders, and knees. You feel it when clouds open for twenty seconds over a ridge and you have to decide whether to stop, climb, or shoot. In mountains, deserts, and national parks, a bag that looks perfectly reasonable in a hotel room can turn brutal by kilometer eight.
This is where photographers learn the value of limits. On a hike, the best travel photography kit is not about creative abundance; it is about maintaining energy until the light gets good. The best frame of the day often arrives late, when the impatient have already packed away their camera. A lightweight camera kit preserves your patience.
For hikes, road-trip lookouts, canyon trails, and alpine days, prioritize weather sealing, stability, and easy front access. You need a system that lets you move quickly without burying the camera.
Recommended adventure setup:
- Body: sealed APS-C or full-frame mirrorless camera for travel
- Main lens: wide-to-standard zoom, such as 16-55mm APS-C or 24-105mm full-frame equivalent
- Optional second lens: small fast prime for camp, huts, or low-light scenes
- Accessories: lightweight tripod, ND or CPL filter, rain cover, two spare batteries, cleaning cloth, zip bags for dust and weather
- Carry system: backpack with sternum strap and padded insert, or a clip on the shoulder strap
Best practices on the trail:
- Keep the camera outside the main compartment if weather allows
- Use one filter wallet rather than loose filter cases
- Store batteries close to your body in cold conditions
- Pack the tripod on the side, not across the back, to avoid snagging on rock or brush
- Separate food, water, and gear so you do not have to unpack everything at each stop
Adventure travelers often assume they need an ultra-wide lens for every landscape. Sometimes you do. But many of the strongest mountain and coastal images happen in the 35mm to 70mm equivalent range, where the scene feels more intimate and layered. If the choice is between carrying a heavy extra lens or staying fresh enough for sunrise the next day, stamina usually wins.
Best travel photography kit for beach and island trips
Sand is sneaky. Salt is worse. Sea spray hangs in the air long after a wave breaks, and it settles onto lens glass, buttons, zippers, and straps with a fine mineral film. Island travel also comes with its own choreography: ferry queues, tiny rental cars, scooter baskets, boat ladders, loose towels, damp clothing. A beach setup must be simple enough to protect quickly when conditions shift.
The visual reward is enormous. Turquoise coves, bleached harbors, linen shirts catching wind, fish laid over crushed ice, white walls glowing pink at sunset. But these scenes rarely require a massive kit. On coastal trips, the best travel photography kit is usually a sealed body, one versatile zoom, and a system that protects against sand and spray.
Recommended beach and island setup:
- Body: weather-resistant compact or mirrorless camera for travel
- Main lens: 24-70mm or 24-105mm equivalent
- Optional second device: waterproof action camera for boats, surf, snorkeling, and rain squalls
- Accessories: circular polarizer, microfiber cloths, dry bag, silica gel packets, spare battery, small blower
- Bag: soft travel camera bag inside a tote or backpack, plus a lightweight waterproof pouch
What matters most by the sea:
- Clean the front element often because salt haze ruins contrast fast
- Change lenses indoors, never on an open beach
- Keep a dedicated cloth for drying hands before touching the camera
- Use a polarizer sparingly; it can deepen skies beautifully but also make water reflections look uneven at wide angles
- Let gear acclimate in shade when moving from hot sun to air-conditioned rooms
If your trip includes boats, paddleboarding, or open jeep transfers on islands, think in layers. Your camera lives in a dry bag inside your day bag, not loose at the top. That one habit saves more vacations than any premium accessory.
Best travel photography kit for safaris and wildlife trips
Wildlife changes everything. Suddenly your lens is not about flexibility but reach, and the subject decides the schedule. Dawn begins cold and blue. Dust rises behind tires. A lion appears farther than you hoped. Elephants fill the frame faster than expected. The air smells of dry grass and warmed earth, and the light can shift from silver to harsh white in a single game drive. This is the one trip type where specialized gear can genuinely change your results.
Even here, though, discipline matters. Safari vehicles are cramped. You may be sharing space with other guests, jackets, bean bags, binoculars, and water bottles. On this kind of trip, the best travel photography kit should maximize usable focal length without turning every transfer into a burden. You still need to move through airports, lodge steps, small planes, and luggage weight limits.
Recommended safari setup:
- Body: fast autofocus mirrorless or DSLR with strong burst performance
- Main lens: 100-400mm, 200-600mm, or 70-300mm depending on airline and vehicle constraints
- Second lens: 24-70mm equivalent for camps, landscapes, and closer wildlife encounters
- Accessories: bean bag for vehicle window support, blower, dust brush, two to four batteries, plenty of cards, SSD backup
- Bag: padded but soft-sided travel camera bag that fits under the seat or in your lap on small transfers
Safari-specific strategy:
- Prioritize reach over extra bodies if weight is tight
- Use a zoom rather than a prime unless you know the reserve and vehicle style well
- Bring more storage than you think you need; burst shooting eats cards fast
- Keep one body mounted and ready before the drive begins
- Cover gear during dusty sections even if the sky looks clear
If you are torn between a larger sensor and a longer lens, many safari travelers are happier with more reach than more resolution. A sharp telephoto on a lighter body often beats a prestigious full-frame setup left in the lodge because it is too bulky.
Best travel photography kit for winter trips and low-light travel
Cold weather reveals every weakness in your system. Batteries drain quickly. Fingers lose dexterity. Condensation fogs viewfinders and front elements when you step indoors. Snow confuses meters and can turn a beautiful scene into a flat white sheet unless you watch exposure carefully. Yet winter also delivers some of the most cinematic travel light: blue afternoons, amber windows, quiet streets, and snow that amplifies color.
The best travel photography kit for winter is not just about low-light performance. It is about keeping the camera functional without forcing yourself into endless glove-off adjustments. If your trip includes Christmas markets, northern lights, ski towns, winter rail journeys, or icy coastlines, think warm power management, simple controls, and a bag that stays organized when your hands are cold.
Recommended winter setup:
- Body: mirrorless camera for travel with good stabilization and reliable battery reporting
- Main lens: 24-105mm equivalent or 24-70mm equivalent
- Optional second lens: fast 35mm or 50mm for evening streets and interiors
- Accessories: 3 to 4 batteries, thin glove liners, weather cover, silica gel, microfiber cloth, compact tripod
- Bag: insulated-feeling daypack or travel camera bag that keeps small accessories easy to grab
Winter field habits:
- Keep spare batteries in an inside jacket pocket
- Use a zip bag when bringing cold gear into a warm room to reduce condensation
- Dial in positive exposure compensation in snowy scenes if the camera underexposes
- Simplify your controls before you go outside so you are not menu diving in the wind
- Avoid breathing directly onto the viewfinder or rear screen in freezing air
Cold amplifies friction. The more friction you remove at home, the freer you are to notice the crunch of snow under boots, the steam from a food stall, or the way neon reflects off slush after dark.
How to pack the best travel photography kit without losing your mind
Packing is where intention becomes visible. You can tell a lot about a photographer by how their bag opens. A messy bag means slow lens changes, missed moments, scratched filters, misplaced batteries, and more time kneeling on pavements looking for card cases. A clean system does not need to be expensive, but it does need to be repeatable. The best travel photography kit works because every item has a home.
A good photography packing list also reduces emotional noise. Once the system is set, you stop renegotiating every morning. You know where the clean card is, where the used battery goes, where the rain cover lives, and which pocket carries documents. That kind of order matters even more on long transit days, especially if you are also thinking about sleep and recovery on flights, something that pairs well with Long Haul Flight Comfort Tips for 2026: Feel Better on Arrival.
My packing order for camera gear for travel is simple:
- Put the camera body with main lens in the quickest-access zone.
- Pack the second lens only if it serves a specific shooting goal.
- Keep batteries, charger, cable, and plug adapter in one tech pouch.
- Store memory cards in a hard case with used cards reversed.
- Place the cleaning kit in an outside pocket.
- Keep the SSD with the laptop or tablet, not buried under clothes.
- Add a foldable tote or dry bag for unexpected weather or boat days.
Here is a compact photography packing list you can use before every trip:
- Camera body
- Main lens
- Optional second lens
- Phone and charging cable
- Batteries and charger
- Memory cards
- SSD or backup drive
- Laptop or tablet if needed
- Card reader
- Cloth, blower, wipes
- Tripod or mini tripod if required
- Filters if relevant
- Rain cover or dry bag
- Travel insurance details
- Plug adapter
Carry-on rules matter. In most cases, camera bodies, lenses, batteries, memory cards, and hard drives belong in cabin baggage, not checked luggage. Lithium battery rules vary by airline, but spare batteries should generally travel in carry-on with terminals protected. Check the latest guidance from TSA and your airline before you fly.
For digital organization, create one folder structure before departure and stick to it. A small amount of discipline on the road beats a week of chaos when you get home.
How to get there
Different trips demand different transport strategies, and transport should shape your kit. A city break built around trains can handle a slightly heavier bag than a safari with bush flights. An island trip with ferries and scooters rewards soft bags and smaller footprints. If you are building the best travel photography kit, think about how the journey treats your gear before you think about the destination itself.
The smartest move is to match baggage style to transport style. Airports favor carry-on discipline. Trains favor quick side access. Ferries reward waterproof layers. Road trips allow a bit more freedom, but only if you can secure the bag from heat, dust, and prying eyes when you stop for lunch.
Here are four common photo-trip routes and what they mean for your packing:
| Trip type | Typical route | Time and cost | Transport notes | Official link |
|---|---|---|---|---|
| European city break | London Heathrow LHR to Lisbon LIS | 2h 45m, often £70 to £220 return | Easy for one travel camera bag plus daypack; Lisbon Airport Metro reaches the center in about 20 minutes for around €1.80 | ANA Airports |
| Iceland road trip | New York JFK to Keflavik KEF | 5h 40m, often $350 to $700 return | Flybus to Reykjavík takes about 45 minutes and starts around ISK 3,999; compact gear helps on windy roadside stops | Isavia KEF |
| Safari gateway | Amsterdam AMS to Kilimanjaro JRO | about 8h 30m non-stop or longer via hubs, often €650 to €1,200 return | Road transfer JRO to Arusha is about 1 hour; some camps use small-aircraft baggage limits around 15kg soft luggage total | Kilimanjaro Airports |
| Greek island trip | Athens ATH to Santorini JTR or Piraeus ferry | Flight 45 to 55 minutes from €45; ferry 5 to 8 hours from about €46 | Ferries mean salt air and stairs; use a soft-sided bag and quick weather protection | Blue Star Ferries |
If you are mixing transport modes on one trip, pack for the harshest part of the chain, not the easiest. A kit that is comfortable in a hotel taxi may become annoying on a ferry ramp or a train platform. Photographers who travel often already know this truth: the transit day is part of the shoot day.
Things to do
A gear article can become abstract unless you tie equipment back to actual scenes. The point of the best travel photography kit is not to admire gear at home; it is to be ready when a place begins to glow, echo, steam, glitter, or slow down. Travel photography becomes richer when you plan around activities that naturally produce good light and layered stories.
Instead of chasing only postcard viewpoints, build your days around movements through a place. Markets at opening time, ferry arrivals, blue-hour bridges, dawn lookouts, working harbors, night food streets, and museum districts in the rain all reward prepared photographers. If you need help keeping these stops organized on your phone, Travel Apps for Every Trip in 2026: The 7-Icon Rule is a useful companion read.
Try building your photo days around these specific experiences:
- Shoot sunrise over Alfama from Miradouro de Santa Luzia in Lisbon, then walk down toward the Sé before the tram crowds build
- Photograph Skógafoss on Iceland’s South Coast early or late, when lower sun makes mist glow and rainbows cut across the falls
- Take a dawn game drive in Tarangire National Park near Arusha, where long lenses shine when elephants cross dusty light beams
- Work blue hour from Oia Castle in Santorini, then move off the main viewpoint into side lanes for quieter rooflines and doorways
- Photograph food prep at Borough Market, 8 Southwark Street, London, arriving just after opening for cleaner frames and faster service
- Use a fast prime after dark in Kyoto around Pontocho Alley and nearby streets, where lantern light and reflections build atmosphere
- Shoot a harbor-to-hill sequence in Reykjavík, starting at Sun Voyager sculpture and walking toward Hallgrímskirkja as the sky shifts
The best subjects are often transitions rather than landmarks: fishermen unloading crates, commuters under rain, a café opening shutters, light hitting tiled walls for thirty seconds before disappearing. Build your schedule around those changes and your gear choices become easier.
Where to stay
Accommodation quietly shapes your photography more than many people realize. A room with a small desk, reliable outlets, and enough space to lay out cards and batteries can save a trip. So can an early breakfast, blackout curtains before sunrise starts, or a lobby where you can wait out a rainstorm with a coffee instead of abandoning the day. When choosing where to stay, think like a working traveler, not just a tourist.
For the best travel photography kit, the ideal stay is not necessarily the most luxurious one. It is the place that supports your routine: charging, cleaning, backing up, and getting out the door fast. That often means location over square footage, and layout over brand prestige.
Here are solid photo-friendly stays by budget tier, with price ranges that commonly appear in shoulder season or advance bookings:
| Budget tier | Suggested stays | Typical price range | Why they work for photographers |
|---|---|---|---|
| Budget | KEX Hostel in Reykjavík, Lost Inn Lisbon, Moxy Lisbon City | about €30 to €140 per night depending on room type and season | Central locations, social spaces, and enough practicality for charging and early starts |
| Mid-range | citizenM Tower of London, Fosshotel Reykjavík, Arusha Planet Lodge | about €140 to €260 per night | Reliable desks, better insulation, good breakfast timing, and smoother work surfaces for backing up files |
| Luxury | The Reykjavik EDITION, Canaves Oia Suites in Santorini, Four Seasons Safari Lodge Serengeti | about €500 to €2,000+ per night | Premium locations, sunrise or wildlife access, concierge help with transport, and calmer in-room workflow |
What to look for before booking:
- Secure in-room storage or a trustworthy safe
- Elevator access if you carry a tripod and laptop
- Early breakfast or packed breakfast options
- Proximity to your first and last shooting locations
- Enough outlets near the bed or desk
- Laundry if you are on a long trip with dusty straps and covers
For photo-heavy itineraries, a small room in the right neighborhood often beats a beautiful room far from the action. Staying closer to your dawn location gives you more sleep, and more sleep gives you better decisions.
Where to eat
Photographers eat badly when they are disorganized. They skip meals, then buy whatever is nearest when the light is flat. But food is part of the story of a place, and good meal planning can help both your body and your images. The smell of butter, smoke, broth, grilled meat, citrus peel, or coffee can pull you into scenes you would have missed if you were simply rushing to the next viewpoint.
The trick is to choose meals that match the rhythm of shooting. Start early with something quick near sunrise, go bigger at midday when the light is harder, and leave room for a flexible golden-hour snack so you are not forced indoors when the sky finally turns. A good photography day flows better when the food plan is as intentional as the gear plan.
These are reliable food stops and styles that suit photo-minded travelers:
- Lisbon: Manteigaria in Chiado for fresh pastéis de nata, then Mercado da Ribeira for varied lunch options and people-watching
- Reykjavík: Café Loki near Hallgrímskirkja for rye bread ice cream, lamb soup, and easy access to the church steps for city views
- Arusha: Khan’s Barbeque for nyama choma and chips mayai after a dusty drive; hearty, fast, and deeply local in feel
- Santorini: Lucky’s Souvlakis in Fira for a quick, inexpensive meal between walks and blue-hour shooting
- London: Borough Market for roast sandwiches, cheese toasties, pastries, and visual texture at almost every stall
- Kyoto: Nishiki Market for skewers, tamagoyaki, pickles, tofu, and tightly framed color-rich scenes that reward a small camera
If street food is part of your travel style, pick busy vendors with high turnover and visible cooking. For a deeper hygiene mindset, Street Food Safety Abroad in 2026: Eat Like a Local pairs very naturally with photo-led market days.
Practical tips
By this point, the gear list is only half the story. Real success comes from knowing when each kit shines, how weather changes your choices, and what small administrative details can ruin a day if ignored. The best travel photography kit is practical not because it is boring, but because it stays useful when plans shift.
Season matters more than most gear debates. A telephoto is useless if haze swallows the view. A drone is pointless if local rules forbid it. A heavy tripod may feel smart until you are hauling it through a humid city in August. Build around climate, transport, and culture first.
Use this quick planning table before finalizing your photography packing list:
| Trip style | Best months | Weather notes | Pack these extras | Watch out for |
|---|---|---|---|---|
| European city breaks | April to June, September to October | Mild light, fewer extremes | Compact umbrella, fast prime | Pickpockets in crowded transit and tourist zones |
| Iceland road trips | June to September for roads, February to March for winter drama | Fast-changing wind and rain | Rain cover, cloths, gloves | Sudden weather closures and spray at waterfalls |
| East Africa safaris | June to October, plus January to February in many parks | Dry season gives cleaner wildlife visibility | Bean bag, dust brush, more cards | Small-aircraft weight limits and dust |
| Greek islands | May to June, September | Bright sun, wind, salt spray | CPL, dry bag, light layers | Ferry delays, strong meltemi winds |
| Winter city trips | December to February | Short daylight, cold batteries | Spare batteries, glove liners | Condensation when moving indoors |
Other practical rules worth following:
- Keep spare lithium batteries in cabin baggage and cover contacts
- Register drones where required and check local no-fly zones before departure; start with FAA for US rules and EASA for Europe
- Insure your camera gear and confirm theft coverage actually applies outside your home country
- Download offline maps and transport tickets before you leave Wi-Fi
- Use eSIM or local SIM plans with enough data for backup uploads, navigation, and cloud sync
- Back up every evening in two places if the images matter to you
- In crowded cities, keep your travel camera bag plain and avoid changing lenses in the street unless necessary
A final mindset tip: gear should widen your awareness, not narrow it. If you are so busy guarding or adjusting equipment that you stop noticing sounds, smells, pace, and people, your kit is too complicated for that trip.
FAQ
What is the best travel photography kit for most people in 2026?
For most travelers, the best travel photography kit is a mirrorless camera for travel, one versatile zoom lens, a smartphone, two spare batteries, several memory cards, a compact cleaning kit, and a small backup drive. It is enough for landscapes, streets, food, and portraits without becoming exhausting.
Do I really need a tripod when I travel?
Not always. If your trip is mostly daytime cities, markets, and casual walking, you can skip it. Bring a compact tripod for northern lights, long exposures, waterfalls, self-portraits, astrophotography, or low-light city scenes where stability matters.
Is a phone enough instead of a dedicated camera?
Yes, for many trips. A phone is perfect for minimalist travel, beach days, food-heavy city breaks, and travelers who care more about speed and sharing than printing large files. If you want more control, better subject separation, stronger telephoto reach, or better low-light consistency, a dedicated camera helps.
How many lenses should I pack?
One or two for most trips. A photography packing list with too many lenses creates weight, decision fatigue, and missed moments. Bring one general-purpose lens and only one specialist lens if the trip clearly demands it.
What is the safest way to carry camera gear on flights?
Keep camera gear for travel in your carry-on, not checked baggage. Use a padded insert or dedicated cabin-sized travel camera bag, protect spare batteries, and keep essentials like body, lens, cards, and chargers within easy reach for security screening.
A final thought before you zip the bag
The best travel photography kit is less about owning the perfect camera and more about trusting the kit you chose. When the setup is right, you stop bargaining with your bag. You move more lightly through stations and harbors, you climb one more staircase, you stay out ten more minutes after sunset, and you notice more of the world because the gear is no longer asking for attention.
That is usually when the good photographs appear. Not when you have packed everything, but when you have packed enough and left room for the trip itself.